
How to moonshine in Red Dead Redemption 2
As we’ve talked about in my previous article, with the latest update to Red Dead Redemption 2, Rockstar allows you to start producing moonshine in Red Dead Redemption 2 Online for PC and PS4.
I don’t usually drink alcohol at all, but I will be drinking a cup of Bailey’s throughout the writing of this article. Please don’t mind me if the last portions of it are a bit parched weee…
With this update, you’ll be able to produce moonshine, own a bar, hire a band, have patrons showing up and serving them drinks. Smells like profit.
Want to know how to increase revenue and lower mash costs?
If you’re reading this article, looking for info on how to reduce mash costs in RDR2, please know that this article details all aspects of moonshining – including how to lower mash costs. However, you should definitely check out my other specialist post as well. It focuses not only on ways to reduce mash prices, but also on how to improve revenue via other means.
Improve your game with the new Launch Argument Composer
Let me also share a free tool that I’ve developed recently. It helps you set up Launch Arguments to improve graphics, performance and help with bugs, crashes, stuttering, etc.
Go check it out at this page: PopcornGamer’s Red Dead Redemption 2 Launch Argument Composer.
Wheeler Rawson & Co Club Pass 2
With the new update, the Wheeler Rawson & Co Club Pass 2 Outlaw Pack No2 allows players to gain access to a huge selection of exclusive goodies – enough to make you tipsy!
These include a new dog (huskie), weapon ammo, clothing, horse masks, discounts, treasure maps, gold bars, emotes, etc.
With 100 levels and almost one reward per level, there’s plenty of content there. Regarding price, the pack costs 40 gold bars – but playing through it should unlock approximately the same amount of gold bars, plus all the discounts and ammo savings. It is one humongous task to unlock everything though.
As a reference price point, 55 gold bars cost 20€ at the Rockstar store. If you do the daily quests each day, you should be able to get approximately 5 gold bars per day.
How to start Moonshining
Before you start, please keep in mind that you need to rank up your Trader role to rank 5, or at least completed a sale.
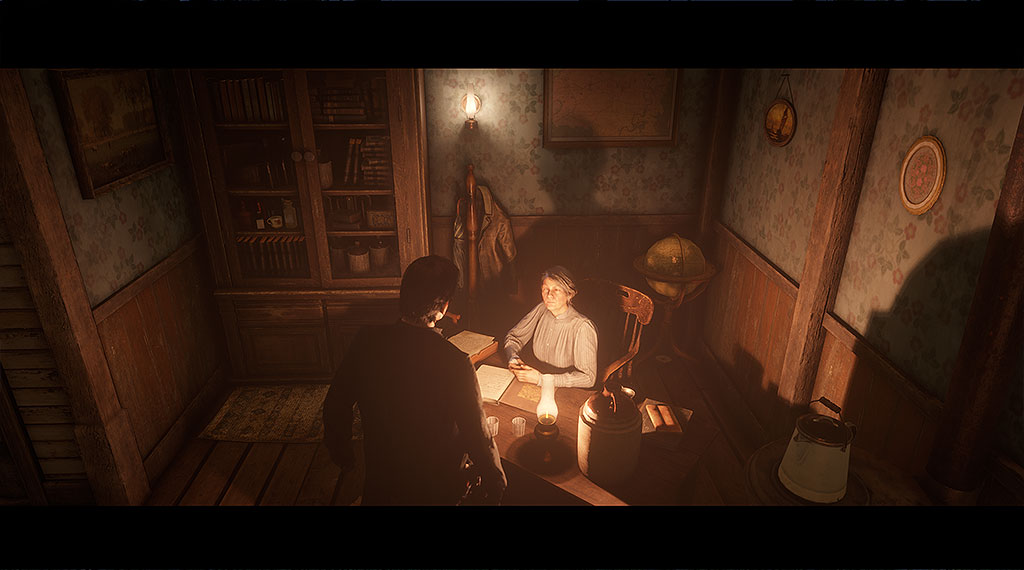
To begin your brave new entrepreneur life, you should find Cripps at your camp (if he hasn’t packed it already!). He will handle you a quest to find Maggie near Emerald Ranch. You should also receive a letter from Cripps asking you to go meet Maggie at the Emerald Ranch. Alternatively, press F1 once the Moonshiner update notification pops up. After the descriptive menu shows up, hold the spacebar to initiate the quest to become a moonshiner.

You will then be able to purchase your very own speakeasy and become a booze baron in Red Dead Redemption 2 Online.
You will first need to pick a location for your moonshiner shack (you’ll need to pay 25 gold bars upfront, although I believe this might come for free with a Twitch Prime subscription). Later on, if you’re not happy with the location you selected, you will be able to change your shop location by paying an additional 250$.
After buying the location, you’ll be awarded several new booze recipes to explore.
Later on, you will also be able to upgrade to a bar and even add a dancing stage and a band. The bar expansions or the patrons that show up to your bar do not earn you any money. Most extras are just cosmetic, with the exception of the distilleries that provide you with a stronger alcohol that sells for more money.
Producing and supplying the bar
You can access the Moonshiner Shop when talking to Maggie. There you will be able to expand your moonshine operation with an underground bar. This costs 950$ plus one token – or 38 gold bars instead.
At first, the bar feels empty and sad and more like a milk parlor.
There are 6 people in there quietly sipping their milk. Fortunately, you will be able to change this by drawing in more patrons and improving the room decoration.
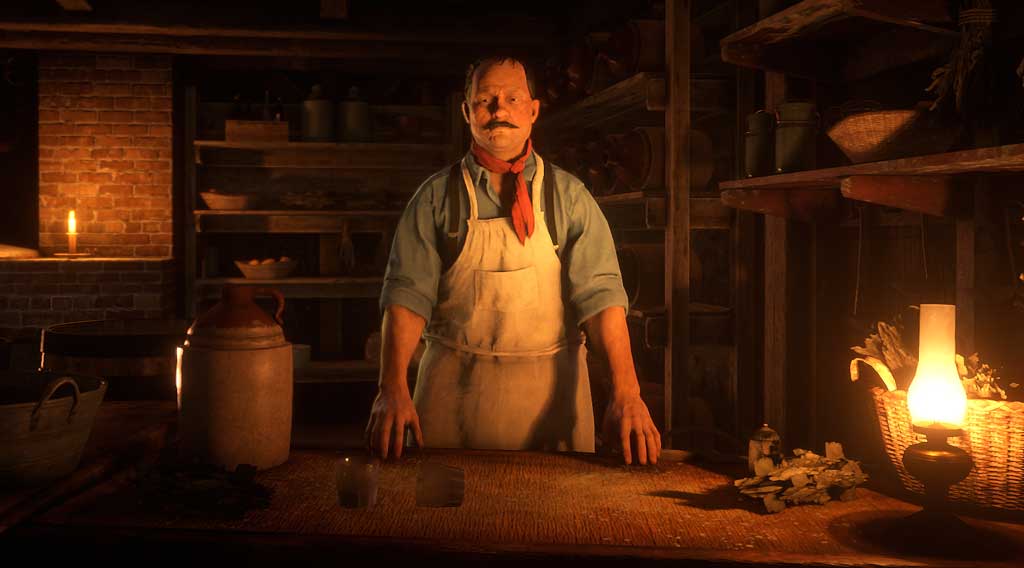
Marcel, the cook, will supply the bar with whatever recipe is being produced. If you’re not giving Marcel the right ingredients and tools, he will supply the bar with a standard quality recipe. This doesn’t really draw that many customers in. To improve your business, you should upgrade your recipe on the table next to Marcel.
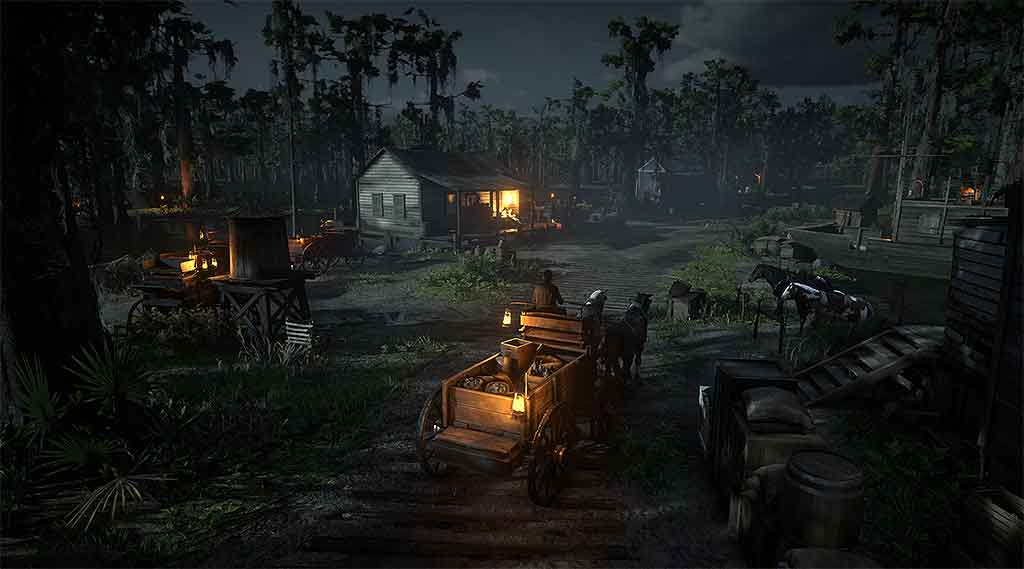
This connects with the supply missions, where your mission is to deliver moonshine to potential customers on the world map. The mash cost can be lowered from 50$ to 30$ by asking Maggie to do Bootlegger Missions, explained further down this article.
On the table next to Marcel you are able to pick the type of moonshine, and the flavoring (ingredients which can be bought or picked outside, like fruit and herbs). Distilling takes time. Once a batch of moonshine is ready, you can go deliver it to your clients. You are transporting fragile cargo, and special care must be taken not to break the bottles of moonshine.
While on your way to your client, you might come across Revenue Agent roadblocks. You can either let them search your cargo or try to break through the barricades and avoid inspection.
The best way to prevent any bottles from being destroyed during the transport is to use the Cinematic Camera. Going off-road is certain to cause damage to your cargo. Bullets will harm your cargo just slightly. So it is best to stop your transport, kill the baddies and then start moving again. Trying to keep running while shooting back at the agents is a recipe for disaster.
To increase your profits you should upgrade the strength of your moonshine. To do that, you must first buy the Condenser and Polished Copper upgrades from Maggie.
A batch of booze that costs approximately 30$ to produce can be sold for 80$ with a weak distillery. If you upgrade it to a strong distillery, you might be able to earn up to 247$. This makes for a very good investment (if all goes well with the delivery). The time it takes to produce a batch varies, but it should take somewhere between 30 minutes (weak distillation) to 60 minutes (strong distillation) to be finished and ready for export.
Setting up shop – the story missions
The first mission Maggie will give you is to find Marcel, the French cook. The mission is rather simple – he has been kidnapped. Just go rescue him by the small bandit camp nearby.
Alternatively (non-exclusively) you can also permanently borrow some moonshining equipment from a nearby rival moonshining operation.
Once these two quests are finished, Marcel will show you the “Engine Room”. This is where he will show you the distillation tools and equipment.
Marcel tip: A stronger alcohol sells for more, but it takes longer to produce.
After this is cinematic, you’ll be spawning outside the shack. Once you go back in, Maggie will allow you to access the Moonshiner Store, which grants you access to recipes, bar and band building expansions, bar decorations, equipment to improve the quality (and price) of your booze, and a bunch of pictures to place behind your bar counter. All of this for a price, of course.
At the moonshiner store, you’re able to buy a toxic moonshine bottle or pamphlet (recipe). These create a noxious cloud that chokes and stuns enemies.
If you can’t afford the 1 token + 950$ for the bar, you can always buy the upgrade with 38 gold bars instead. It sounds absurd, but its true. You’re better off trading with Cripps until you get those 950$ and save the 38 gold bar expense for other stuff!

Before we go into the next missions, let me just add that sometimes the game won’t allow you to accept a new one in order to progress with the storyline missions. This could be because either Maggie is stuck in an animation, or maybe because there’s a timer between missions. Relogging seems to solve this issue sometimes. Doing these missions will lower the price of the mash ingredients to make the beverages.
Blood is thicker than ‘shine
You need to pick up Maggie’s nephew Lem. Lem is being transported to the penitentiary. Once you arrive at your destination, you will need to find Lem’s prison transport documents which are located in a chest inside the larger tent to the south (might depend on where the camp spawns). Listen to the officers talking – they will tell you where to look. Stealth is an option if you manage to get to the chest unnoticed. Be careful not to waste any lives – you will need them later on!
After clearing the camp or running with the documents, you will have to wait for the convoy to arrive at a different location. There will be plenty of enemies – I recommend a rolling block rifle and a shotgun. Be careful – these enemies are not your usual bandits. Their weapons are good and their aim is very accurate at long distances.
While taking Lem to your shack, a cutscene shows what happened to Maggie, and what caused her gruesome scars.
Once you finish all the missions, you will be able to replay them at different difficulty levels. Considering this one is tough in regular mode, it should prove challenging to play it in higher difficulty levels.
Where There’s Smoke There’s Firewater
This storyline mission takes you to the swamps of Bayou Nwa.

You will first need to find Maggie’s explosives in the Scarlett Meadows. Look for clues to their location. I highly recommend using a bow and arrow to quietly dispatch the two guys overlooking the stable. The explosives should be inside a lockbox in one of three locations. The clues highlight a trail to those lockboxes.
Further down the road, a wagon will appear. Use it to infiltrate the moonshine camps undetected. Take out the driver as soon as possible, as to avoid being spotted by the camp’s guards.
Once inside the camp, avoid collisions and be prepared. This is a huge camp with many enemies. Alligators roam the outskirts of the mission area. You’ll be fighting Lemoyne Raiders, which are easy to kill – but there are plenty of them. Many of them are carrying sawed-off shotguns – so you’re better off attacking them with a repeater or a rolling block rifle to avoid close-range surprises.
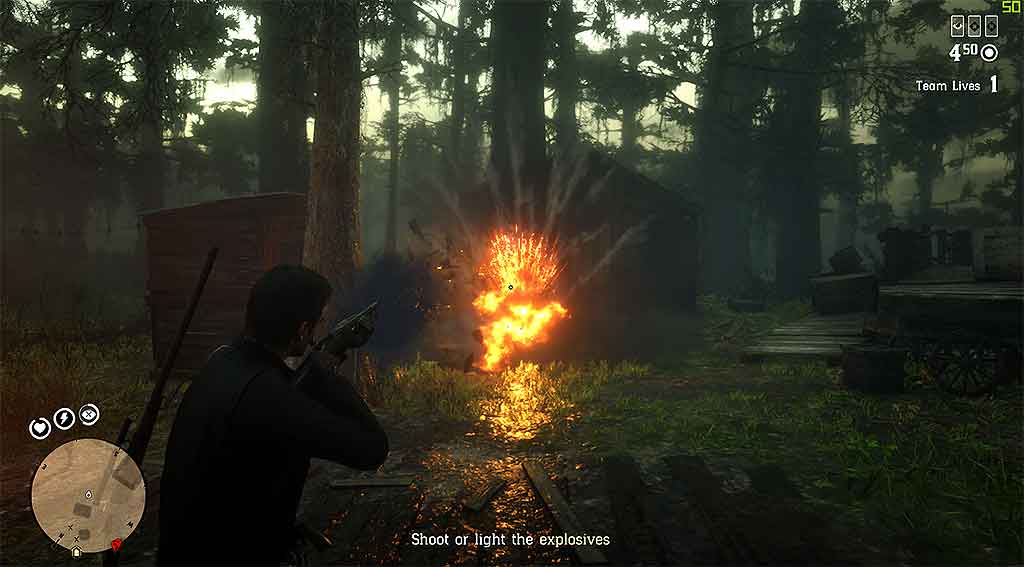
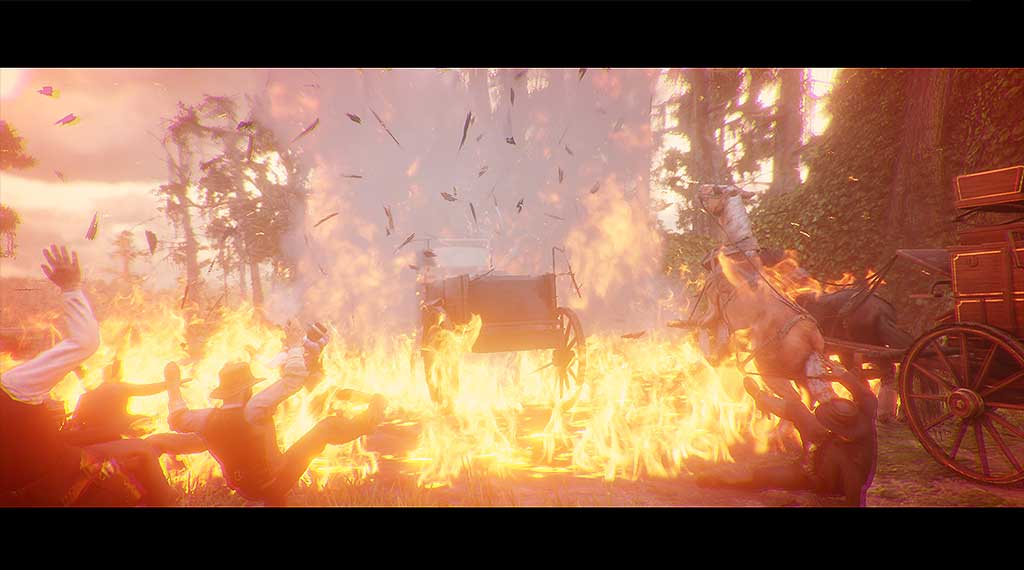
Once you find all the stills, all you have to do is attach a stick of dynamite to it and light the fuse. You can also shoot the stick of dynamite. These are Maggie’s sticks of dynamite and not the ones on your inventory. There’s a collectible tarot card at the entrance to the first house next to the northwestern bridge.
There’s no timer on this mission so take your time to pick them rivals one at a time. Most of these enemies have very little loot, though some collectibles may be found.
Come Hell, Come High Water

In this mission, you are tasked with protecting Lem, during a ship delivery at Van Horn. The mission is rather straightforward – just hop on the boat and shoot at the enemies until Lem manages to reach a safe harbor and deliver his trades.
During this mission you will find enemies on small boats, along the shores and even on a moving train. When facing enemies on the shore, be aware that some carry dynamite to damage Lem’s ship. Make sure to take them out before they reach the ship.

The train is so far away that you need a rolling block rifle to take out those enemies. There are ammo boxes for rifles and shotguns on the top tier of the boat.
A Bitter Means to a Bitter End
In this one, your objective is to ruin a rival’s production by adding a special mixture to the booze. Tainting the vats will earn you a bigger reward.
If for some reason you fail to accomplish this, you can always destroy the vats with your weapons.
To make the mixture, you will need fresh ingredients. Maggie points out the location of some of the ingredients. Along the way you will find a bear (watch out) that will supply you with animal fat. Closer to the objective you’ll find a couple of tents with 3 enemies being attacked by a cougar. Try not to be seen by crouching and avoiding them. Grab the Oleander sage past the camp. If they spot you, take the time to loot them and skin the cougar.
Move forward to the next camp and go around it until you find Creeping Thyme. You only need one. Try to avoid the guards as there are many of them.
To craft the mixture hold E to rest and then R to craft.
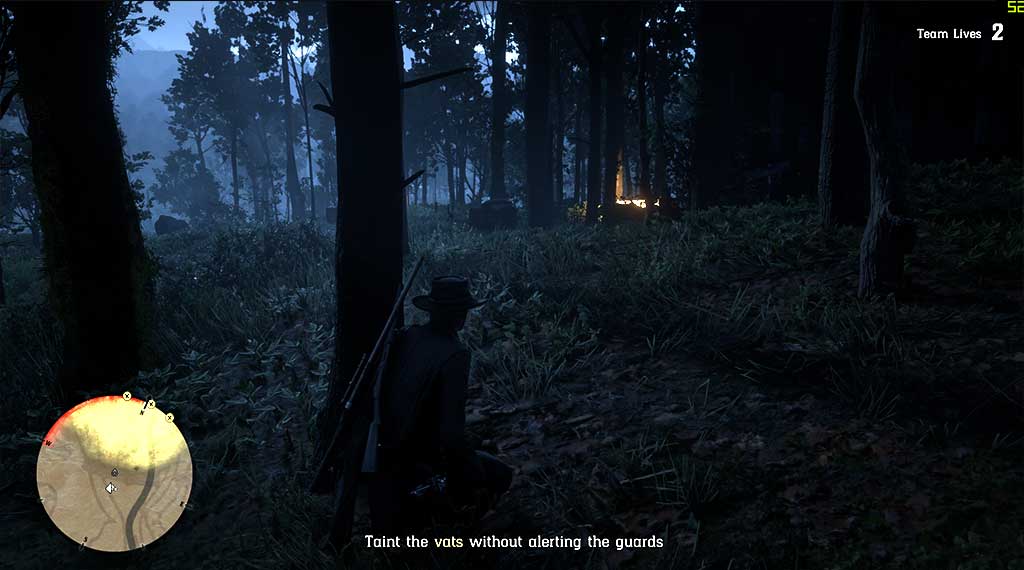
Next up, you will need to taint the vats without alerting the guards by staying undetected. If they are looking at the vats, wait for them to move away, or deal with them silently.
These guys have an army of dirty, sick dogs that will sniff you out and attack you if you’re detected.
To destroy the vats simply shoot them and they will blow up.
They will send a couple of horsemen after you – a fight you can easily avoid by running towards the final objective.
The Certainty of Death and Taxes
In this mission, your job is to protect Lem, capture your rival Danny-Lee and get rid of Hixon.
On the first part of the job you will need to prepare an ambush by spilling moonshine around an area. Then you wait.
Things don’t really go as planned. Grab a shotgun and run after Hixon. Instead of killing them one by one, simply push your enemies into the fire or fire at them into it.
When you finally exit the fire corridor, you’ll find yourself on a road riddled with enemies. Use the trees for cover. There are some crates along the road so try to avoid it. Move to the left of it. It will be easier for you to spot them on the road, behind cover. There’s also a very good reason to move left of the road. There’s a deadly Maxim machine gun at the end of the road. When you move to the left, the machine gunner will have his view obstructed by a tree and thus unable to hurt you.
After dealing with Hixon, avoid all enemies by running into the swamp and over the railway. Keep running towards Danny-Lee, hogtie him and deal with the enemies. If you’re unable to call your horse, grab one from the bandits and stow Danny-Lee on it. Then make a run to the final objective.
This was the last storyline mission.
You are now able to repeat these missions at a different difficulty level. Besides any loot and mission rewards, you should earn 50$ through the Benefits menu that shows up when you access the multiplayer main menu (simply press ESC while in free roam).
Bootlegger missions
“Bootlegger” missions are available from Maggie. These represent simpler-than-storyline-missions that also help you lower mash prices.
In one of them, you need to deviantly poison a rival bootlegger’s stock. Alternatively, you’re able to destroy it and then deal with every enemy around it and the ones that spawn later on. Be careful when approaching the distillery as, when punctured, it fires steaming hot vapors that throw you to the ground. Enemies deal a significant amount of damage with their weapons, and time is a concern as things can get tricky if you start respawning too often.
In one situation, the initial mission objective was so far away from my shack that the timer wasn’t enough to go there while going in a rather straight line.
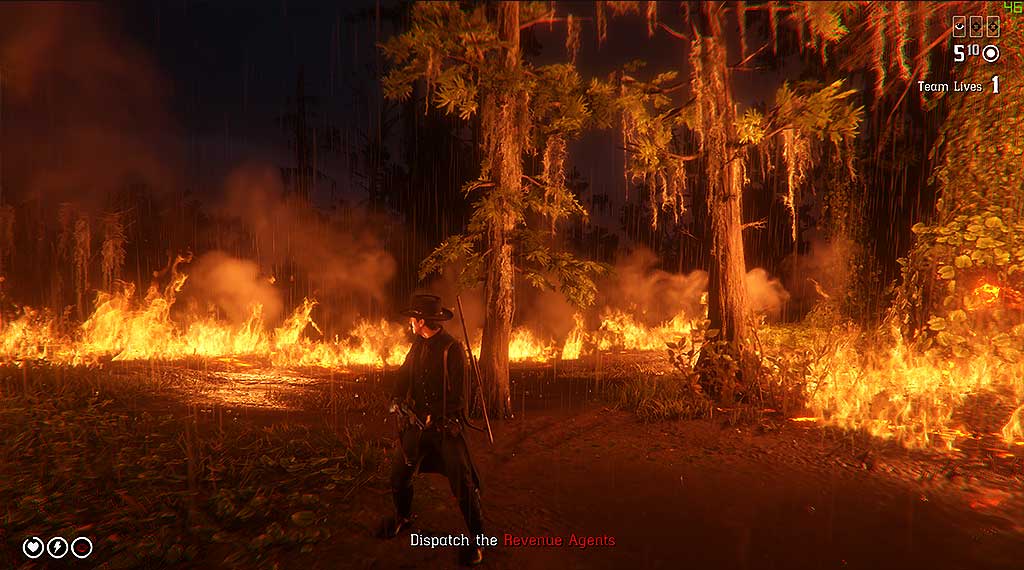
In another mission, Maggie asks you to clear roadblocks placed by the Revenue Agents in two locations. Once you reach the first one, a timer starts, so make sure you don’t waste too much time dealing with all the agents. A stealth approach is possible but very difficult as they face both sides of the road. Revenue Agents are trained shooters. Be aware that they are very precise even at longer distances. Shoot the oil lamps to prevent them from taking cover behind the boxes nearby.
The third one was my favorite. I even giggled a little. You have to escort a drunk patron from the nearest saloon. While doing so, you will face a couple of enemies with their fists raised, ready to strike you. The patron is too drunk to go from point A to point B in a straight line, so expect having to follow him into some dark alleys. This mission is rather simple and easy, but fighting with your fists is always tricky in RDR2. Make sure you do it after drinking a few shots of moonshine.
Corpses, corpses everywhere
The substantial number of corpses leftover from these missions means that there’s plenty of stuff to loot. These Revenue Agents also seem to hold special ammo very often. Considering the number of shots required to take them out, it is only wise to loot them all afterward!
This article was made possible by the contributions of several Redditors: Waydownunder91, dbern707, Freejaveliner, (adding more as they come)
The original Reddit post is available right here.
This post has been read by 71361 people!


I’m terrified of generally okay people, but I disabled adblocker because the article was worth it.
Thank you, glad you liked it. Enjoy your game!