Red Dead Redemption 2, a game renowned for its immersive Wild West narrative, also captivates players with its array of paranormal encounters and eerie side characters. These creepy characters and supernatural elements add a layer of mystery and intrigue, making the game a treasure trove for paranormal enthusiasts, explorers, and completionists.
Spoiler alert – we’ll delve into 15 weird or paranormal creatures and characters that you can encounter in the vast, mysterious world of Red Dead Redemption 2. Starting with…
The Strange Man
The Strange Man, an enigmatic figure appearing throughout Red Dead Redemption 2, offers cryptic messages and unsettling insights. His knowledge of the protagonist’s past actions and the vague predictions about the future add a layer of mystery and paranormal intrigue to the game. Players encounter him in various locations, where he imparts his enigmatic wisdom. The Strange Man’s presence leaves players questioning his true identity and purpose. Several references to the devil seem to surround him.
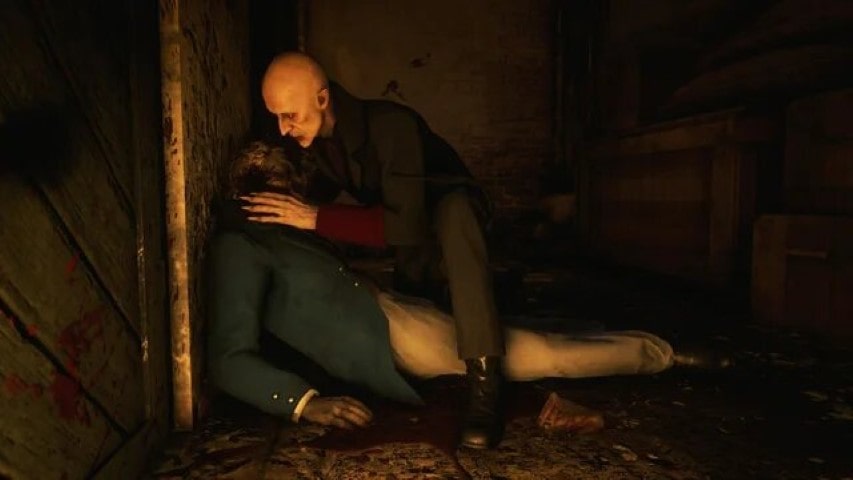
The Vampire of Saint Denis
In Saint Denis, players can uncover a vampire by following a series of clues. This paranormal encounter offers a unique and unsettling experience, adding a touch of gothic horror to Red Dead Redemption 2. The vampire’s existence reveals a narrative of an ancient evil lurking in the back streets of a modern city.
The Night Folk
In the eerie swamps of Bayou Nwa, players may encounter the Night Folk. These hostile figures, known for their disturbing rituals, add a chilling, supernatural element to the game’s atmosphere. Their silent, sudden ambushes and unsettling presence reveal a darker side of the already dangerous Bayou, hinting at a world beyond the living.
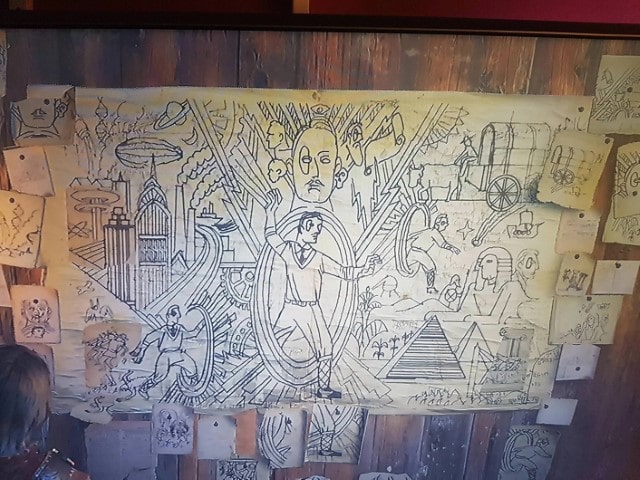
Francis Sinclair
Francis Sinclair is a man from another time that players encounter during a questline involving time travel and mysterious artifacts. He tasks players with finding rock carvings scattered across the game world. One of which seems to depict an atomic bomb. It leads to a mind-bending revelation about his true nature. Francis Sinclair’s narrative adds a connection to the future and a hidden message about the nature of time itself. He seems out of time and place and challenges players’ perception of reality within the game’s universe, especially when he shows up as a newborn baby at the end of the story. Some relate this character to “future” events in Grand Theft Auto V.
The Feral Man
Roanoke Ridge holds a secret – the Feral Man. This wild character is living in harmony with his pack of wolves. His presence reveals a narrative of isolation and a life far removed from civilization. Beware: he doesn’t take kindly to strangers lurking about his cave. Is he a werewolf, or just a loony?
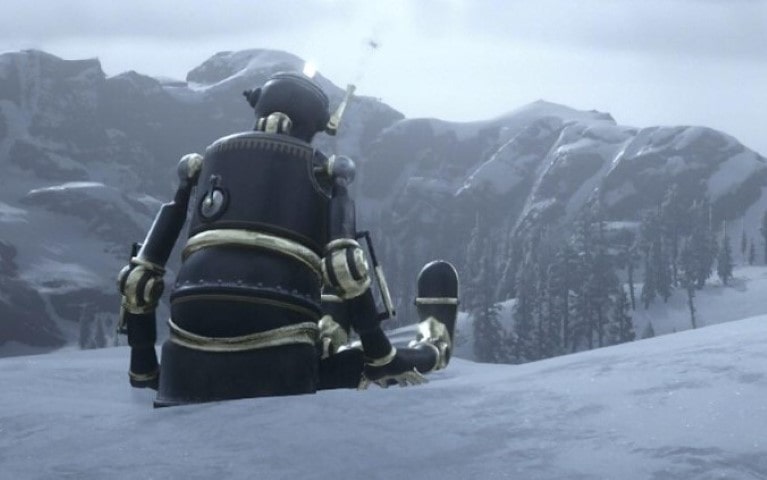
The Robot
Meet Marko Dragic, the inventor, on a remote hill laboratory where he works on a secret, revolutionary project for the new century: a sentient piece of machinery. Not all goes well and eventually, Dragic is found dead and the robot escapes. A quest leads you to the robot high on the peak of a frozen mountain. Alone facing the far mountains he voices a sad “…Papa…”. The robot’s existence and its creator’s fate reveal a narrative of ambition, invention, and the blurred line between life and artificial life.
Bigfoot
Of course he is in Red Dead Redemption 2… a bit hard to find though… By examining various animals and following a trail of birds, players can uncover the hiding place of this legendary creature. Although Bigfoot remains elusive, mysterious piles of bones scattered throughout the game world suggest its presence.
The Ghost Train
Late at night, players may witness a ghost train haunting the tracks of New Hanover. This spectral locomotive adds a supernatural element to the game’s world, enhancing the paranormal atmosphere of Red Dead Redemption 2. The ghost train’s appearance reveals a narrative of a tragic accident and lingering spirits.
The Locked-Up Braithwaite Girl
In Rhodes, you can find a mentally ill locked-up girl in an outhouse, revealing a tragic and disfigured story. Her family decided to lock her up in an outhouse instead of sending her to a sanatorium. Gertrude screams constantly and repeatedly recites a mysterious number sequence that somehow relates to Grand Theft Auto V’s phone number for Madam Nazaar (a character that first appears in Red Dead Redemption).
The Mutant Creature
A creepy Frankenstein-like creature can be found in a house in West Horn, featuring a pig’s head, wings, and multiple limbs. The abomination can be found in a sort of biology laboratory in an abandoned mansion.
The Cave Devil
A hermit living alone in a cave in West Elizabeth claims to be the Devil himself. He wears gray hair styled to resemble the Devil’s horns. A glowing red pentagram can be found near him, indicating that if he isn’t the Devil, he might at least be in communion with demonic forces.
The Donkey Lady
In Cholla Springs, players can come across the corpse of a creature that appears to be a mix of a donkey and a woman. Since it’s not a living creature, it remains unknown if this was a supernatural being.
The UFOs
Aliens have invaded Red Dead Redemption 2, with UFO encounters scattered across the map. These extraterrestrial sightings provide an eerie, otherworldly experience, adding a sci-fi twist to the game’s narrative. The presence of UFOs reveals a narrative of hidden alien life and mankind’s quest for understanding.
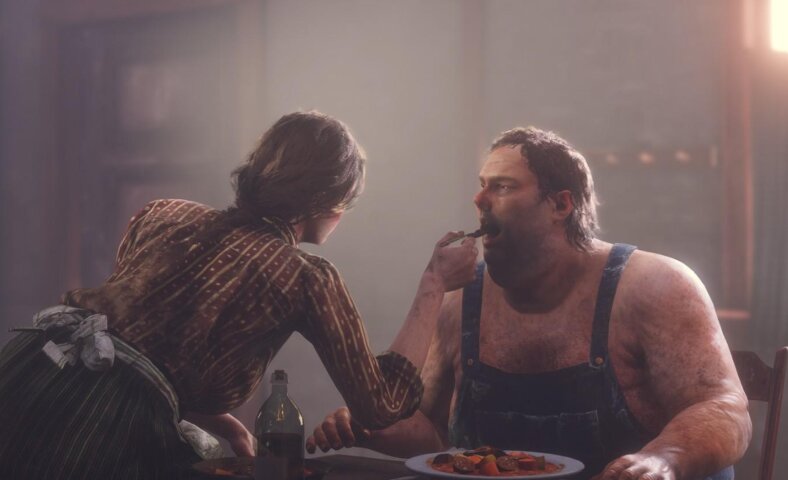
Bray and Tammy Aberdeen
Pig farmers. Go visit them. They’ll invite you to dinner. Some of the most disturbing characters in the game, they’re an incestuous couple of brother and sister who might just be cannibals. The food tastes… different. After drugging you they’ll take your money and drop you in a shallow grave.
The Serial Killer
You’ll find several corpses grisly mutilated throughout the world. Follow the clues and you’ll meet the one responsible at his lair filled with newspaper clippings and several mutilated corpses in a truly horrifying scene. Oh, and he isn’t happy about you showing up.
The truth is out there
Red Dead Redemption 2 offers a captivating world filled with paranormal creatures, creepy side characters, and supernatural phenomena. Each character not only adds to the eerie atmosphere but also reveals a unique narrative, enriching the overall storyline. So, prepare to explore the unknown and uncover the secrets of these paranormal creatures in Red Dead Redemption 2.
Red Dead Redemption 2 is a long game. Here’s a short version of its narrative in 7 short chapters for a quick read – spoiler alert.
The epic tale of Red Dead Redemption 2 revolves around the Van der Linde gang, led by Dutch Van der Linde, in the year 1899. Spanning various chapters, the narrative follows protagonist Arthur Morgan, a loyal enforcer for the gang, as they navigate a treacherous world. Here’s a breakdown of each chapter and how the story progresses.
Chapter 1: Colter
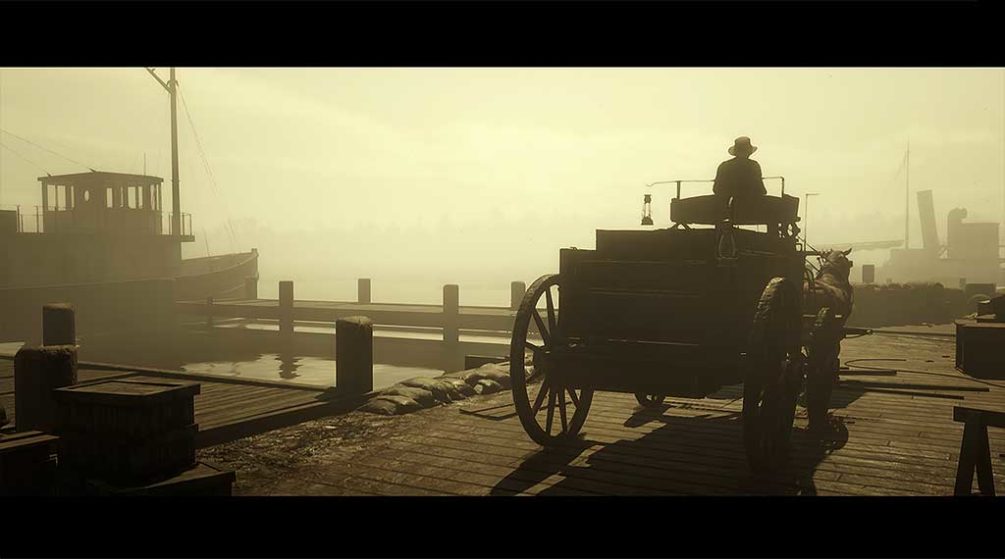
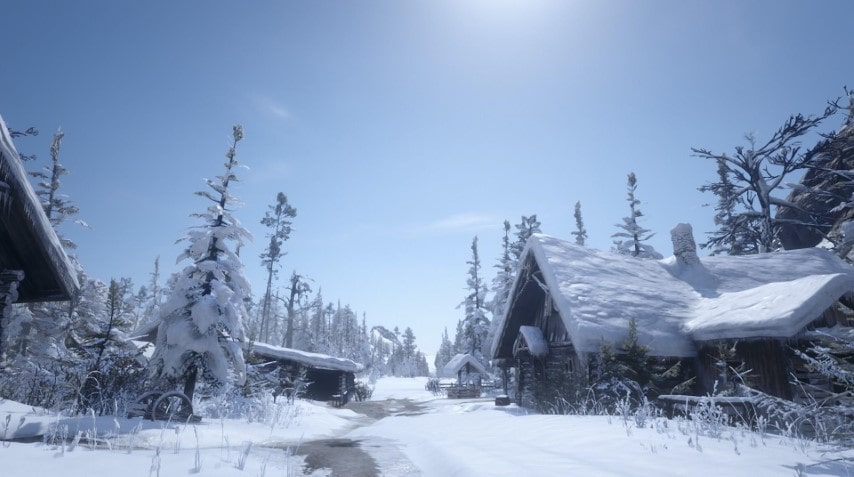
As the game begins, the gang seeks refuge in the snow-covered mountains of Ambarino following a botched robbery in Blackwater. Their temporary sanctuary in the abandoned mining town of Colter sets the stage for survival and planning their next moves.
Chapter 2: Horseshoe Overlook
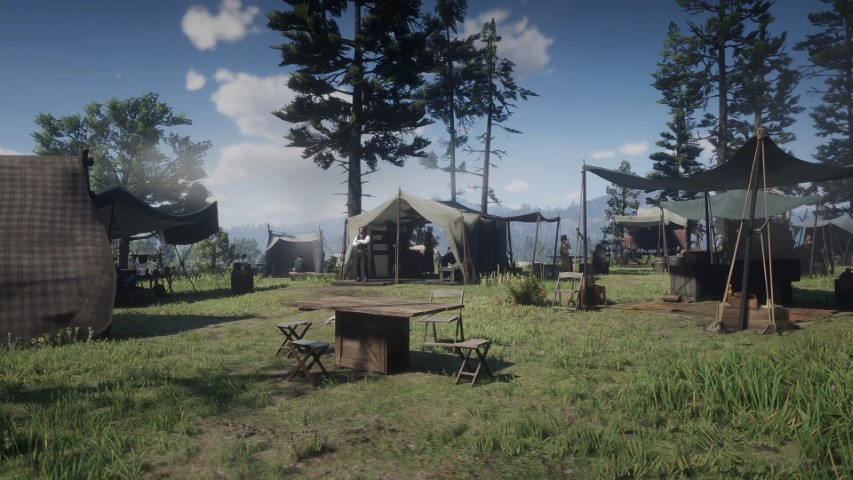
Relocating to the Heartlands of New Hanover, near Valentine, the gang establishes a new camp. They embark on missions, engage in activities, and encounter rival gangs, law enforcement, and intriguing characters. Internal tensions start to rise, questioning Dutch’s sanity and leadership.
Chapter 3: Clemens Point
The gang moves to a camp near Rhodes in Lemoyne, entangling themselves in a local feud between the Gray and Braithwaite families. Arthur aids the Braithwaites in a mission that ends in bloodshed. The gang also plans a bank robbery in Saint Denis, aiming to expand their influence.
Chapter 4: Shady Belle
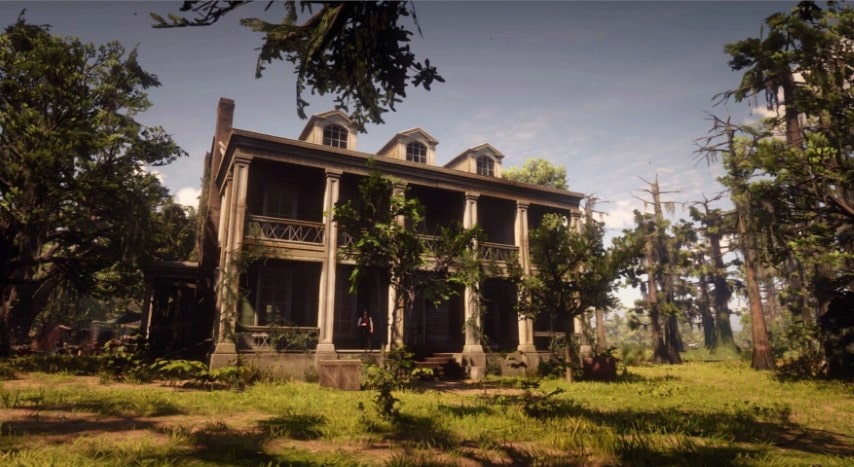
After their camp is attacked, the gang relocates to Shady Belle, an old plantation near Saint Denis. Dutch becomes increasingly desperate, obsessed with rescuing a captured gang member and retrieving their Blackwater funds. Heists turn deadly, leading to the loss of key ally Hosea Matthews. Some members of the gang escape on a random boat setting off to an unknown destination.
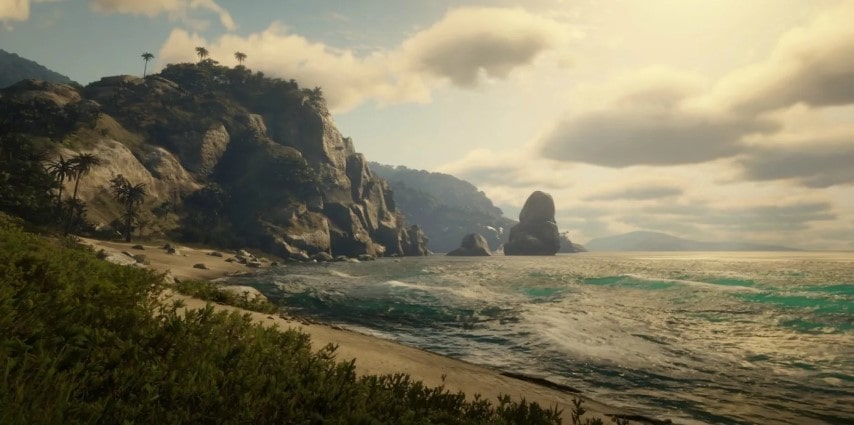
Chapter 5: Guarma
After the failed ferry robbery, gang members find themselves stranded on Guarma, a tropical island. Arthur aligns with local rebels to fight against an oppressive plantation owner. Their ultimate goal is to escape the island and reunite with the gang. Arthur discovers Micah’s betrayal.
Chapter 6: Beaver Hollow
Returning to the mainland, the gang seeks refuge in Beaver Hollow, an abandoned mining town. As the Pinkertons close in, internal divisions deepen. Arthur’s battle with tuberculosis intensifies, leading to revelations about Micah’s treachery. He aids John Marston’s escape. In a violent conclusion to the story, Arthur confronts Micah while Dutch stands by watching. His disease takes the best of him during the fight. He dies sick, wounded, and betrayed but peacefully watching the sunset.
Epilogue: Parts 1 & 2
Years later, the story shifts to John Marston’s perspective as he builds a new life on a ranch in Beecher’s Hope. Undertaking tasks to establish his homestead, John confronts his past and seeks redemption. A climactic final showdown ensues, pitting him against the remaining Van der Linde gang members.
Red Dead Redemption 2’s story delves into themes of loyalty, betrayal, and personal redemption. Through the complex character of Arthur Morgan, players witness the decline of the Wild West, the arrival of civilization, and how it robs us of authenticity and shifts our perception of reality – and the consequences of choices made in a morally ambiguous world.
Moonshine recipes in Red Dead Redemption 2 Online give you the ability to make your special booze, own your very own speakeasy and earn a lot of money. It’s a fun addition to the world of RDR2 and in this article I’ll be covering all there is to know about RDR2’s Moonshine Recipes.
In this post, however, I will simply go over the recipes and ingredients that are required to make the best moonshine.
This is what happens when your ‘shine is too strong
Add power to your booze!
First things first: upgrade your distillery as soon as you can. That will increase profit drastically and the distillation takes longer, which allows you to do other stuff in the meantime. Sure, the upgrade costs are steep, but the value you get in return is well worth the investment.
Here’s a rundown of the upgrade costs:
CondenserUpgrade: 2 Role Tokens + 825$ + Moonshiner Rank 5
To make a batch of a more valuable moonshine you need to upgrade your distillery and then gather all the ingredients. Some recipes only become available by progressing in the Moonshiner role.
Also, keep in mind that buyers change every two hours or so – so you’ll be wise to account for ingredients for different recipes.
Distillation was strong in this one…
Here’s the full list of recipes available
★ Tropical Punch Moonshine
Canned Pineapples
Vanilla Flower
Pear
★ Wild Cider Moonshine
Apple
Currant
Ginseng
★ Berry Mint Moonshine
Canned Berries
Blackberry
Mint
★★ Evergreen Moonshine
Evergreen Huckleberry
Wintergreen Berry
Ginseng
★★ Apple Berry Crumb Moonshine (Bootlegger Story Progress)
Apple
Blackberry
Vanilla Flower
★★ Berry Cobbler Moonshine (Requires Rank 2)
Red Raspberry
Peach
Canned Peaches
★★★ Wild Creek Moonshine (Requires Rank 6)
Wild Mint
Vanilla Flower
Creek Plum
★★★ Spiced Island Moonshine (Requires Rank 12)
Caribbean Rum
Golden Currant
Canned Apricots
★★★ Agarita Sunrise (Complete Bootlegger story)
Agarita
Canned Strawberries
Evergreen Huckleberries
Time is money
Some of these ingredients are available by picking herbs in the game world. However, others are canned fruits or liqueurs and may be harder to find.
Pro tip: many recipe ingredients are buyable via the Wheeler Rawson Catalogue. Rather than the cost, consider them as an investment of …time – as you won’t have to go find them in the game world.
These will allow you to make higher quality moonshine that sells for a LOT more money, which justifies their initial cost.
Always keep a healthy supply of fruits, herbs and liqueurs with you at all times.
Always keep a healthy supply of fruits, herbs, and liqueurs with you at all times. You should guarantee enough fruits and herbs to fulfill two or three 2-star or 3-star recipes.
Simply buy batches of up to 30 cans of fruit and fetch them from the Post Office and try to gather the few remaining ingredients from the game world.
Rise and ‘Shine
You should aim for the more valuable drinks. Namely, the Wild Creek Moonshine, Spiced Island Moonshine, and the Agarita Sunrise whenever possible. Keep this list at hand:
Wild Creek Moonshine: Wild Mint, Vanilla Flower, Creek Plum
Spiced Island Moonshine: Caribbean Rum, Golden Currant, Canned Apricots
Again, keep in mind that some items are buyable via the Wheeler Rawson Catalogue. I highly recommend that you use the Catalogue’s Online version, as it allows you to quickly find your ingredients by using the search functionality.
In the Wheeler Rawson Catalogue you’ll be able to find:
Canned Apricots (0.75$)
Canned Strawberries (1.20$)
Canned Peaches (1.00$)
Orchard Apples (0.40$)
Canned Berries (1.20$)
Canned Pineapples (1.50$)
Bartlett Pears (0.65$).
From Madam Nazar’s shop you’ll also be able to buy:
Currant
Ginseng
Caribbean Rum (via collector map)
Other ingredients are rather easy to find:
Golden Currant – West of Van Horn, near Kamassa River
Red Raspberry – South East of Stillwater Creek
Vanilla Flower – South East of Lake Lagras
Wild Mint – South West of Valentine, near the river
Wintergreen Berry – North of Brandywine Drop
In order to find these items more easily, consider using JeanRopke’s RDOMap.
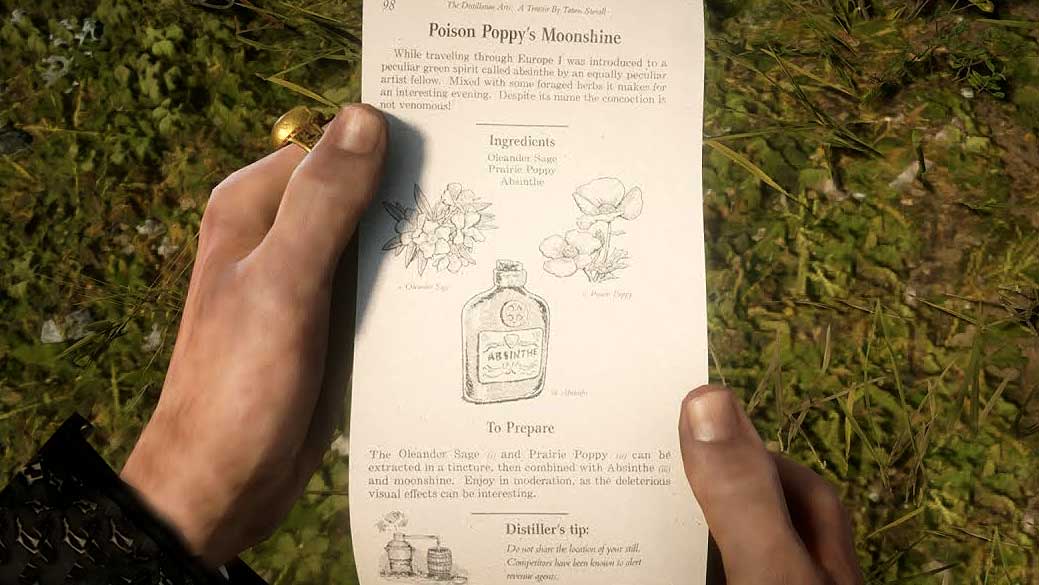
The elusive Poison Poppy recipe
There’s one other recipe that I purposely avoided talking about in this article. The reason is simple: it is difficult to understand how to make it and find its ingredients. I will attempt to clarify this topic:
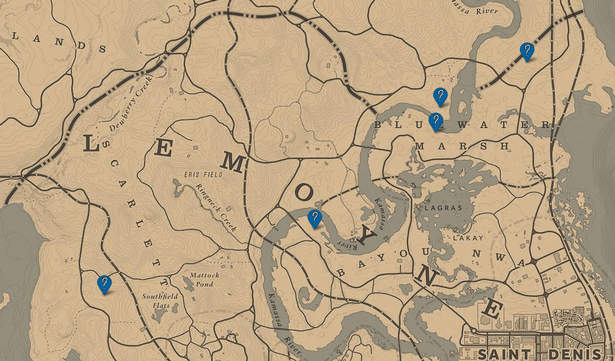
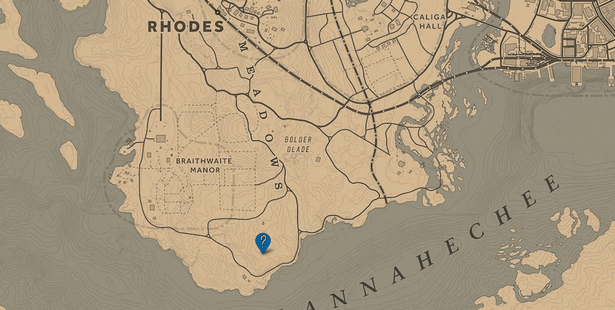
In one of the Moonshine Story missions, you are required to brew a vial of Poison Poppy. However, you don’t get to keep the recipe for this drink. In order to unlock the Poison Poppy recipe, you must first find a recipe pamphlet. There are multiple locations where this spawns.
Try to find a small moonshine operation camp in one of these locations. Go there at night to easily spot the campfire.
Poison Poppy recipe location in Lemoyne
Poison Poppy recipe location in the Cumberland Forest
Poison Poppy recipe location near Rhodes
Poison Poppy recipe location South of the Grizzlies
Credit: Fun2, Tez
Look for the recipe inside the camp’s chest. Once you have read the pamphlet (in your satchel), gather the following ingredients:
Oleander Sage
Prairie Poppy
Absinthe
Go back to your Moonshine Shack and it should now be available. This recipe is harder to find, but it is worth 247$, like the most valuable ones. If you’re having trouble, check out GTAO W’s video.
Moonshining in Red Dead Redemption 2 can be a surprisingly profitable business. There are ways to increase revenue and reduce costs (to lower mash prices and even save on supplies). Some up-start investment may be required.
But before I give you a couple of tips, if you’re on the fence on whether to start moonshining in Red Dead Redemption 2, let me start by saying that it is a rather fun profession to explore. There are plenty of missions to do and they feel quite varied. Playing with friends also seems to increase the number of available bootlegger missions.
Becoming a moonshiner in RDR2 will also allow you to purchase some fancy clothes and items. However, it is the money aspect that most players are after.
Okay, so how do I lower mash prices in RDR2?
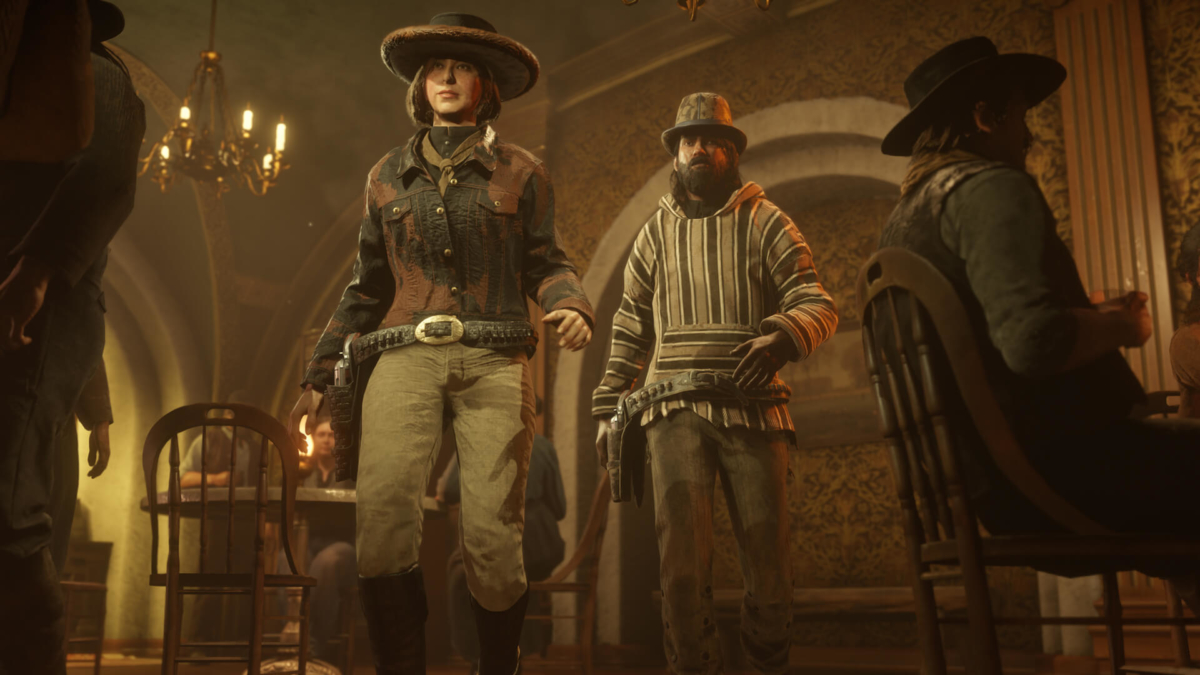
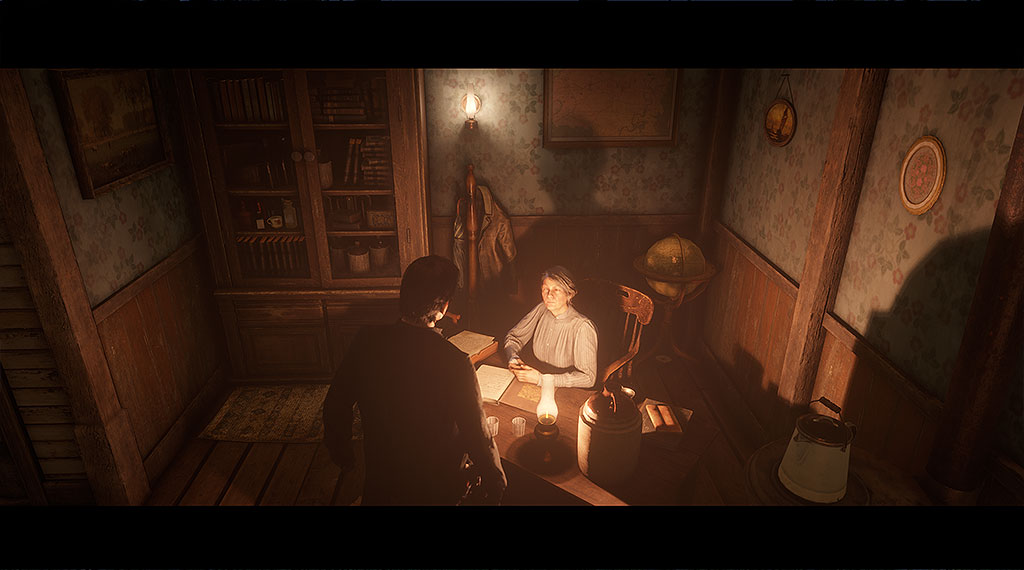
Straight to the point: in order to lower mash prices, all you have to do is to accept Bootlegger missions from Maggie. Talk to her and hold the R key.
Maggie will guide you through the Moonshiner life
Be aware that there’s a 15-minute timer between missions, during which you’re unable to do another one. Sometimes Maggie isn’t there, or she’s stuck in an animation sequence – in which case you should go out of the moonshine shack, give it some time and then go back in again. If this becomes a repeating issue, try using my new tool that helps you optimize CPU performance. Its called RDR2 Launch Argument Composer Tool
Bootlegger Missions
By doing Bootlegger missions, you will eventually be able to lower the cost of producing alcohol significantly. As an example, you will be able to lower the 30$ mash cost down to 10$. This is most noticeable when you upgrade your distillery to be able to produce stronger moonshine. Stronger moonshine requires more time and mash to produce. Instead of paying 30$ per mash dosage, you’ll be paying 50$. The upside is that stronger moonshine sells for a LOT more money. Depending on the quality of the ingredients you’re using, you could sell a batch of booze for up to 247$ per trip. Doing Bootlegger missions also earns you plenty of collectibles, since you’ll be fighting Revenue agents and rival moonshiners that have plenty of expensive items and ammo to loot.
One may argue that the time it takes to do the Bootlegger mission isn’t worth the 20$ discount on mash prices. However, the loot you get from all those revenue agent bodies is worth it in the long run. It earns you special bullets, antique liqueurs, and gold watches, which makes it all much more profitable.
Making the most of your Moonshiner role means optimizing your business in the long run. I highly recommend you check out my additional suggestions on how to make the most of the Moonshiner role:
–Oh, and if you would like a detailed overview of the Moonshiner role, Bootlegger mission tips, as well as some other ideas on how to make the best use of this new content, make sure you check out my other post – A Guide to Moonshining in RDR2 (my most popular post EVER!).
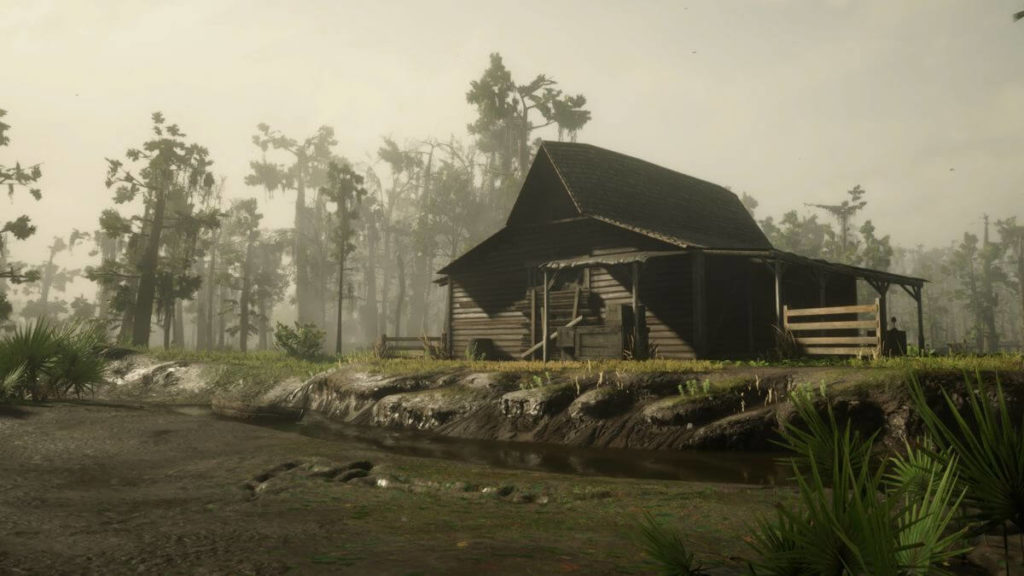
The best Moonshine Shack Location
Moonshine Shack in Lemoyne
Location, location, location
Start by considering where you’ll be placing your Moonshiner shack. Keep in mind that if you’ve already bought the Moonshine shack, you can talk to Maggie to move it somewhere else for 250$.
It may, at first glance, seem irrelevant or hard to figure out the pros and cons of each location. Here are your options:
Bayou Nwa (Lemoyne)
Grizzlies (Ambarino)
Hennigan’s Stead (New Austin)
The Heartlands (New Hanover)
Tall Trees (West Elizabeth)
So let me give you some perspective: Some locations are easier to access. Some are safer or quicker to traverse. It all pays (literally) in the long run.
I’ve seen a lot of players debating this topic, but none seem to ever have mentioned what I consider to be crucial when picking a location. RDR2 will have other businesses coming out in the near future. Making sure that all your businesses are close together is key to maximizing profits over time by reducing trip lengths. We may not know exactly what other businesses are coming, but we may have an idea of where Rockstar is going with their updates and try to guess their new business locations.
Grand Theft Auto V Online has always surprised players with their extensive expansions. There are lots of new varied businesses, each with their own missions, upgrades, and perks. But all of them required a physical location to use them. Rockstar did that again with the Trader and Moonshiner roles in Red Dead Redemption 2. Bounty Hunter and Collector roles don’t require a player-controlled HQ or shack, but they do rely on the Sheriff’s office’s Bounty Board and Madam Nazar’s traveling wagon to operate.
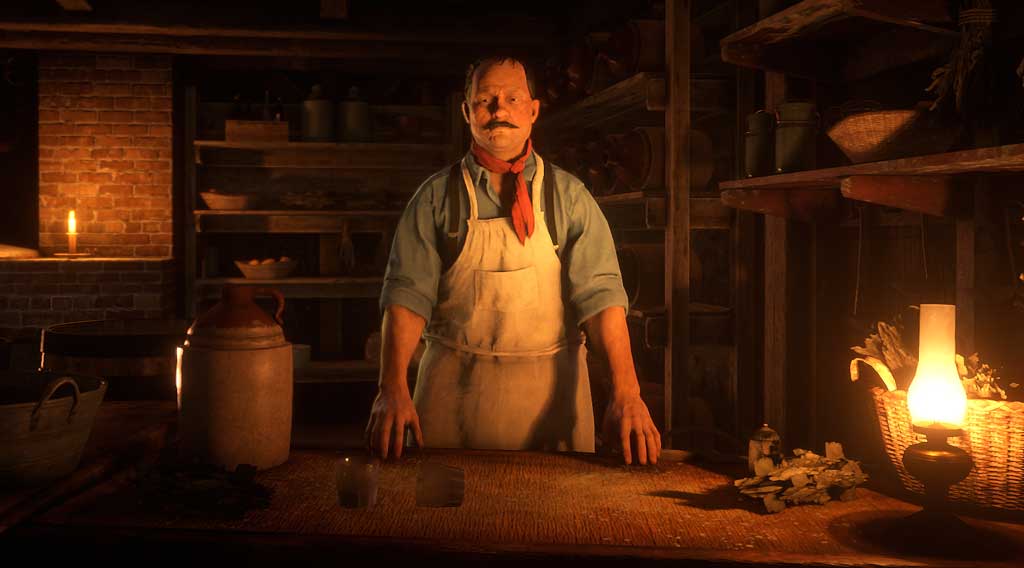
Marcel the Cook
Rockstar seems to be extremely creative when coming up with stuff to do. Let’s see what the community comes up with – here are some community-suggested roles and activities:
Rancher
Farmer
Horse Tamer/Breeder
Miner / Hauler
Herbalist
Bank robbing
Monster hunting
Chariot robbing
Train robbing
Photographer
Sheriff
Pleasure giver
Here are my 6 additions:
Cook
Gold miner (panning on a river)
Miner (in the mines)
Funerary services
River trader (transporting goods on a ship)
Army Mercenary
These ideas are not that wild. Most use gameplay mechanics already in place or easy to add to the game. If Rockstar decides to add any of these roles, they will likely either require a large plot of land, being close to a town, or a brand new map expansion.
Where will the new roles appear?
They will try to pepper the map with new interactive locations, but the far reaches of the map or the most rugged terrain areas tend to become less populated (like the snowy Ambarino regions up north and the Grizzlies to the East). Most of the coastal regions have towns that tend to be crowded and hard to navigate in. The far West towns (Armadillo, Tumbleweed), even though they do feature some mines, are way too barren to be expected that they grow with many new industries.
This leaves us the center core of the map as a prime region for placing role buildings. from the Tall Trees region to the west, most of the New Hannover area, and the non-swampy parts of Scarlett Meadows.
Being at the center also provides you with more options for expansion as every new location option should be close enough.
Van Horn, Annesburg, Tumbleweed, Armadillo, Strawberry, Valentine, and Rodes, all lack either a butcher or a tailor. Both very important requirements for a very practical town.
This is the reason why Blackwater is my favorite town.
Blackwater has most of the stores that you may ever require. It’s small enough that it’s easy to navigate in. It is also very easy to reach via the Great Plains (an amazing hunting ground). Blackwater is also a coastal town with two rivers nearby and it features a Fast Travel post and a bounty board at a convenient location. It doesn’t have a railway line, but it is close to a military fort. No tricky swamps or cliffs to fall and lose your cargo.
All things considered, when choosing a Moonshine shack location, these two would be my ordered best picks:
Tall Trees (West Elizabeth)
The Heartlands (New Hanover)
The Tall Trees region is beautiful and brimming with wildlife. It is easy to transport goods across the Great Plains and to avoid enemies, players and roads entirely. It is also near other areas of potential future interest such as MacFarlane’s ranch, or Thieve’s Landing. To make the most of it, set your trader camp in the Tall Trees or Great Plains region and supply Cripps while waiting for the booze to be ready for delivery.
There are two ways to increase profit. Improve your distillery to make stronger moonshine and improve the quality of your recipe.
Add power to your booze!
I highly recommend upgrading your distillery as soon as you may, as it increases profit and the distillation takes longer which allows you to do other stuff meanwhile.
Condenser: 2 Role Tokens + 825$ + Moonshiner Rank 5
To make stronger moonshine, all you have to do is to have the right ingredients when you’re picking your flavor. Keep in mind that some recipes are unlocked by progressing in the Moonshiner role. Buyers change every two hours or so – so you’re best going for different recipes each time.
Here’s the full list of recipes available
★ Tropical Punch Moonshine
Canned Pineapples
Vanilla Flower
Pear
★ Wild Cider Moonshine
Apple
Currant
Ginseng
★ Berry Mint Moonshine
Canned Berries
Blackberry
Mint
★★ Evergreen Moonshine
Evergreen Huckleberry
Wintergreen Berry
Ginseng
★★ Apple Berry Crumb Moonshine (Bootlegger Story Progress)
Apple
Blackberry
Vanilla Flower
★★ Berry Cobbler Moonshine (Requires Rank 2)
Red Raspberry
Peach
Canned Peaches
★★★ Wild Creek Moonshine (Requires Rank 6)
Wild Mint
Vanilla Flower
Creek Plum
★★★ Spiced Island Moonshine (Requires Rank 12)
Caribbean Rum
Golden Currant
Canned Apricots
★★★ Agarita Sunrise (Complete Bootlegger story)
Agarita
Canned Strawberries
Evergreen Huckleberries
There’s also the secretive but very profitable Poison Poppy recipe, for which you will find in-depth info on how to get it here.
Some of these ingredients are available by picking herbs in the game world. However, others are canned or liqueurs and harder to get.
So here’s my tip: many recipe ingredients are actually buyable via the Wheeler Rawson Catalogue. They’re not that expensive and they will allow you to make higher quality moonshine that sells for a LOT more money.
Always keep a healthy supply of fruits, herbs and liqueurs with you at all times.
Always keep a healthy supply of fruits, herbs, and liqueurs with you at all times. You should guarantee enough fruits and herbs to fulfill two or three 2-star or 3-star recipes. I usually buy batches of up to 30 cans and fetch them from the post office whenever I need them.
That being said, you should aim for the most valuable drinks. Namely the Wild Creek Moonshine, Spiced Island Moonshine, and the Agarita Sunrise whenever possible.
Wild Creek Moonshine: Wild Mint, Vanilla Flower, Creek Plum
Spiced Island Moonshine: Caribbean Rum, Golden Currant, Canned Apricots
Again, keep in mind that some items are buyable via the Wheeler Rawson Catalogue. I highly recommend you use the Catalogue’s Online version, as it allows you to quickly find your ingredients by using the search functionality.
In the Wheeler Rawson Catalogue you’ll be able to find:
Canned Apricots (0.75$)
Canned Strawberries (1.20$)
Canned Peaches (1.00$)
Orchard Apples (0.40$)
Canned Berries (1.20$)
Canned Pineapples (1.50$)
Bartlett Pears (0.65$).
From Madam Nazar’s shop you’ll also be able to buy:
Currant
Ginseng
Caribbean Rum (via collector map)
Other ingredients are rather easy to find:
Golden Currant – West of Van Horn, near Kamassa River
Red Raspberry – South East of Stillwater Creek
Vanilla Flower – South East of Lake Lagras
Wild Mint – South West of Valentine, near the river
Wintergreen Berry – North of Brandywine Drop
How to minimize losses
Once your booze is ready you will have to deliver your batch to a local buyer. When delivering your moonshine, make sure you stick to the road at a medium-fast pace.
Going off-road will guaranteedly break your bottles and your profit will take a toll. I highly recommend using the cinematic camera (V) and then control the vehicle’s speed using Shift or Ctrl.
I don’t usually stop at the Revenue Agent’s roadblocks. There are a couple of reasons why I don’t do that:
Sometimes they won’t stop you at all. If you stop, there’s a very low chance that they let you pass unharmed. Their shots damage your cargo but only slightly. It is much more dangerous to the integrity of your cargo to go off-road.
If you’re being chased, you’re best served by slowing down your vehicle, kill them and then proceed with your trip. Going too fast will likely send you off-track. Stopping will consume time and their bullets will start to hit you.
I’ve seen players kill the revenue agents before they reach the roadblock. But the truth is that you’ll be fighting a lot more agents than you really need to – and in this business, time is money. Just go past them as fast as you can without going off-road or breaking your bottles. You may also want to experiment with the Toxic Moonshine bottles thrown at the roadblock Revenue agents, although I think it might be too expensive to do so every time they show up.
Closing thoughts
Moonshining is a fun specialist role to experience. It certainly earns you quite a bit of money – and you’re able to go hunt or do other stuff while you wait for your next batch of booze to be ready. However, some argue that the bootlegger missions are pointless, as the 20$ savings don’t justify the time cost of doing them. On the other hand, revenue agents tend to carry pretty good loot and collectibles. Thus, in order to justify your time, make sure to always go for their loot!
I don’t usually drink alcohol at all, but I will be drinking a cup of Bailey’s throughout the writing of this article. Please don’t mind me if the last portions of it are a bit parched weee…
With this update, you’ll be able to produce moonshine, own a bar, hire a band, have patrons showing up and serving them drinks. Smells like profit.
Want to know how to increase revenue and lower mash costs?
If you’re reading this article, looking for info on how to reduce mash costs in RDR2, please know that this article details all aspects of moonshining – including how to lower mash costs. However, you should definitely check out my other specialist post as well. It focuses not only on ways to reduce mash prices, but also on how to improve revenue via other means.
Improve your game with the new Launch Argument Composer
Let me also share a free tool that I’ve developed recently. It helps you set up Launch Arguments to improve graphics, performance and help with bugs, crashes, stuttering, etc. Go check it out at this page: PopcornGamer’s Red Dead Redemption 2 Launch Argument Composer.
Wheeler Rawson & Co Club Pass 2
With the new update, the Wheeler Rawson & Co Club Pass 2 Outlaw Pack No2 allows players to gain access to a huge selection of exclusive goodies – enough to make you tipsy! These include a new dog (huskie), weapon ammo, clothing, horse masks, discounts, treasure maps, gold bars, emotes, etc.
With 100 levels and almost one reward per level, there’s plenty of content there. Regarding price, the pack costs 40 gold bars – but playing through it should unlock approximately the same amount of gold bars, plus all the discounts and ammo savings. It is one humongous task to unlock everything though.
As a reference price point, 55 gold bars cost 20€ at the Rockstar store. If you do the daily quests each day, you should be able to get approximately 5 gold bars per day.
How to start Moonshining
Before you start, please keep in mind that you need to rank up your Trader role to rank 5, or at least completed a sale.
To begin your brave new entrepreneur life, you should find Cripps at your camp (if he hasn’t packed it already!). He will handle you a quest to find Maggie near Emerald Ranch. You should also receive a letter from Cripps asking you to go meet Maggie at the Emerald Ranch. Alternatively, press F1 once the Moonshiner update notification pops up. After the descriptive menu shows up, hold the spacebar to initiate the quest to become a moonshiner.
Maggie will pack your bar when you’re not looking
You will then be able to purchase your very own speakeasy and become a booze baron in Red Dead Redemption 2 Online.
You will first need to pick a location for your moonshiner shack (you’ll need to pay 25 gold bars upfront, although I believe this might come for free with a Twitch Prime subscription). Later on, if you’re not happy with the location you selected, you will be able to change your shop location by paying an additional 250$.
After buying the location, you’ll be awarded several new booze recipes to explore.
Later on, you will also be able to upgrade to a bar and even add a dancing stage and a band. The bar expansions or the patrons that show up to your bar do not earn you any money. Most extras are just cosmetic, with the exception of the distilleries that provide you with a stronger alcohol that sells for more money.
Producing and supplying the bar
You can access the Moonshiner Shop when talking to Maggie. There you will be able to expand your moonshine operation with an underground bar. This costs 950$ plus one token – or 38 gold bars instead.
At first, the bar feels empty and sad and more like a milk parlor. There are 6 people in there quietly sipping their milk. Fortunately, you will be able to change this by drawing in more patrons and improving the room decoration.
Marcel, the cook, will supply the bar with whatever recipe is being produced. If you’re not giving Marcel the right ingredients and tools, he will supply the bar with a standard quality recipe. This doesn’t really draw that many customers in. To improve your business, you should upgrade your recipe on the table next to Marcel.
This connects with the supply missions, where your mission is to deliver moonshine to potential customers on the world map. The mash cost can be lowered from 50$ to 30$ by asking Maggie to do Bootlegger Missions, explained further down this article.
Meet Marcel the Cook
On the table next to Marcel you are able to pick the type of moonshine, and the flavoring (ingredients which can be bought or picked outside, like fruit and herbs). Distilling takes time. Once a batch of moonshine is ready, you can go deliver it to your clients. You are transporting fragile cargo, and special care must be taken not to break the bottles of moonshine.
While on your way to your client, you might come across Revenue Agent roadblocks. You can either let them search your cargo or try to break through the barricades and avoid inspection.
The best way to prevent any bottles from being destroyed during the transport is to use the Cinematic Camera. Going off-road is certain to cause damage to your cargo. Bullets will harm your cargo just slightly. So it is best to stop your transport, kill the baddies and then start moving again. Trying to keep running while shooting back at the agents is a recipe for disaster.
To increase your profits you should upgrade the strength of your moonshine. To do that, you must first buy the Condenser and Polished Copper upgrades from Maggie.
A batch of booze that costs approximately 30$ to produce can be sold for 80$ with a weak distillery. If you upgrade it to a strong distillery, you might be able to earn up to 247$. This makes for a very good investment (if all goes well with the delivery). The time it takes to produce a batch varies, but it should take somewhere between 30 minutes (weak distillation) to 60 minutes (strong distillation) to be finished and ready for export.
Setting up shop – the story missions
The first mission Maggie will give you is to find Marcel, the French cook. The mission is rather simple – he has been kidnapped. Just go rescue him by the small bandit camp nearby.
Alternatively (non-exclusively) you can also permanently borrow some moonshining equipment from a nearby rival moonshining operation.
Once these two quests are finished, Marcel will show you the “Engine Room”. This is where he will show you the distillation tools and equipment.
Marcel tip: A stronger alcohol sells for more, but it takes longer to produce.
After this is cinematic, you’ll be spawning outside the shack. Once you go back in, Maggie will allow you to access the Moonshiner Store, which grants you access to recipes, bar and band building expansions, bar decorations, equipment to improve the quality (and price) of your booze, and a bunch of pictures to place behind your bar counter. All of this for a price, of course.
At the moonshiner store, you’re able to buy a toxic moonshine bottle or pamphlet (recipe). These create a noxious cloud that chokes and stuns enemies.
If you can’t afford the 1 token + 950$ for the bar, you can always buy the upgrade with 38 gold bars instead. It sounds absurd, but its true. You’re better off trading with Cripps until you get those 950$ and save the 38 gold bar expense for other stuff!
Just another beautiful day in the West
Before we go into the next missions, let me just add that sometimes the game won’t allow you to accept a new one in order to progress with the storyline missions. This could be because either Maggie is stuck in an animation, or maybe because there’s a timer between missions. Relogging seems to solve this issue sometimes. Doing these missions will lower the price of the mash ingredients to make the beverages.
Blood is thicker than ‘shine
You need to pick up Maggie’s nephew Lem. Lem is being transported to the penitentiary. Once you arrive at your destination, you will need to find Lem’s prison transport documents which are located in a chest inside the larger tent to the south (might depend on where the camp spawns). Listen to the officers talking – they will tell you where to look. Stealth is an option if you manage to get to the chest unnoticed. Be careful not to waste any lives – you will need them later on!
After clearing the camp or running with the documents, you will have to wait for the convoy to arrive at a different location. There will be plenty of enemies – I recommend a rolling block rifle and a shotgun. Be careful – these enemies are not your usual bandits. Their weapons are good and their aim is very accurate at long distances.
While taking Lem to your shack, a cutscene shows what happened to Maggie, and what caused her gruesome scars.
Once you finish all the missions, you will be able to replay them at different difficulty levels. Considering this one is tough in regular mode, it should prove challenging to play it in higher difficulty levels.
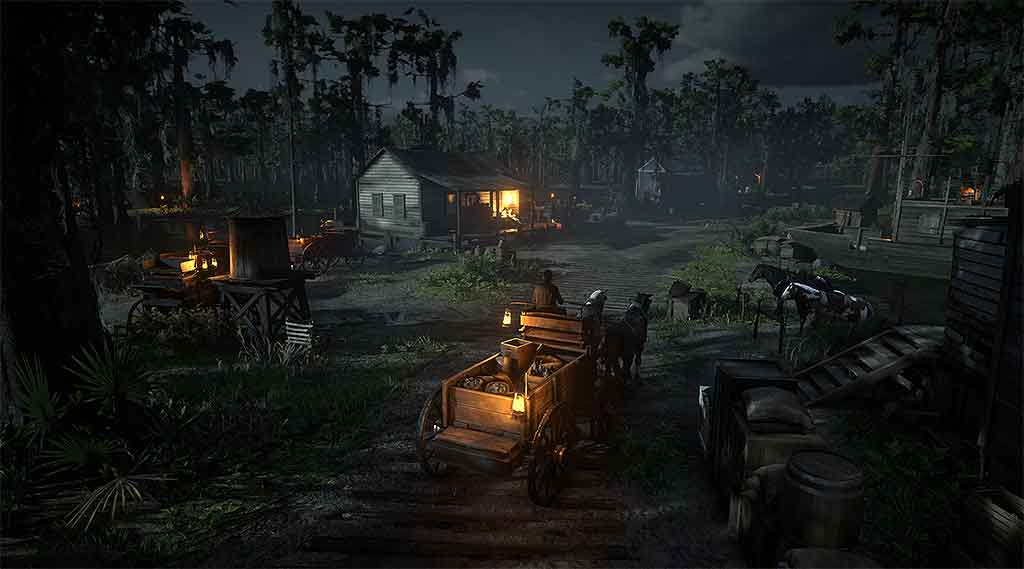
Where There’s Smoke There’s Firewater
This storyline mission takes you to the swamps of Bayou Nwa.
Possible locations for the lockboxes in the first part of Where There’s Smoke There’s Firewater
You will first need to find Maggie’s explosives in the Scarlett Meadows. Look for clues to their location. I highly recommend using a bow and arrow to quietly dispatch the two guys overlooking the stable. The explosives should be inside a lockbox in one of three locations. The clues highlight a trail to those lockboxes.
Further down the road, a wagon will appear. Use it to infiltrate the moonshine camps undetected. Take out the driver as soon as possible, as to avoid being spotted by the camp’s guards.
Arriving at the camp using the wagon avoids detection
Once inside the camp, avoid collisions and be prepared. This is a huge camp with many enemies. Alligators roam the outskirts of the mission area. You’ll be fighting Lemoyne Raiders, which are easy to kill – but there are plenty of them. Many of them are carrying sawed-off shotguns – so you’re better off attacking them with a repeater or a rolling block rifle to avoid close-range surprises.
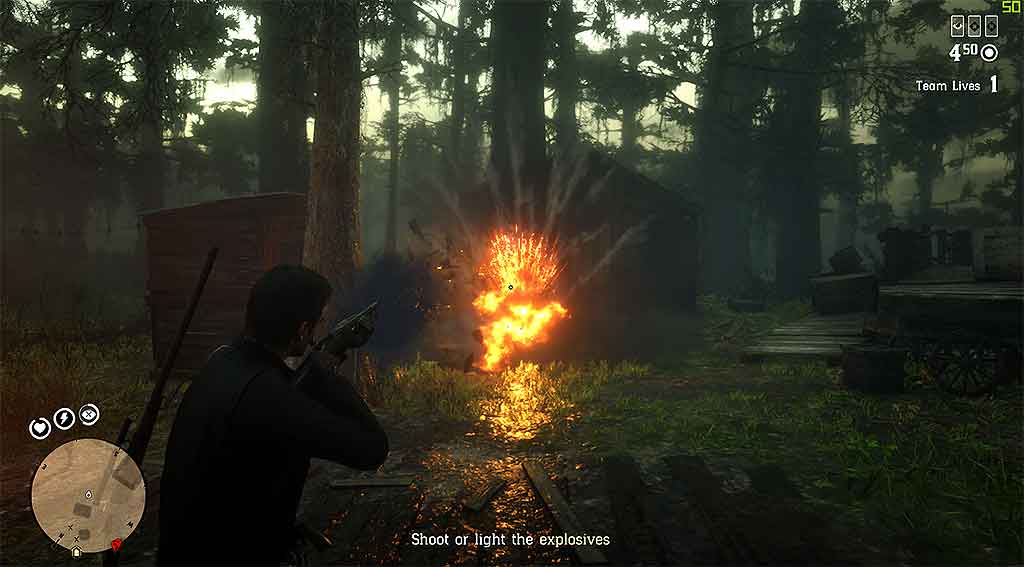
Once you find all the stills, all you have to do is attach a stick of dynamite to it and light the fuse. You can also shoot the stick of dynamite. These are Maggie’s sticks of dynamite and not the ones on your inventory. There’s a collectible tarot card at the entrance to the first house next to the northwestern bridge.
Shoot the dynamite instead of lighting the fuse!
There’s no timer on this mission so take your time to pick them rivals one at a time. Most of these enemies have very little loot, though some collectibles may be found.
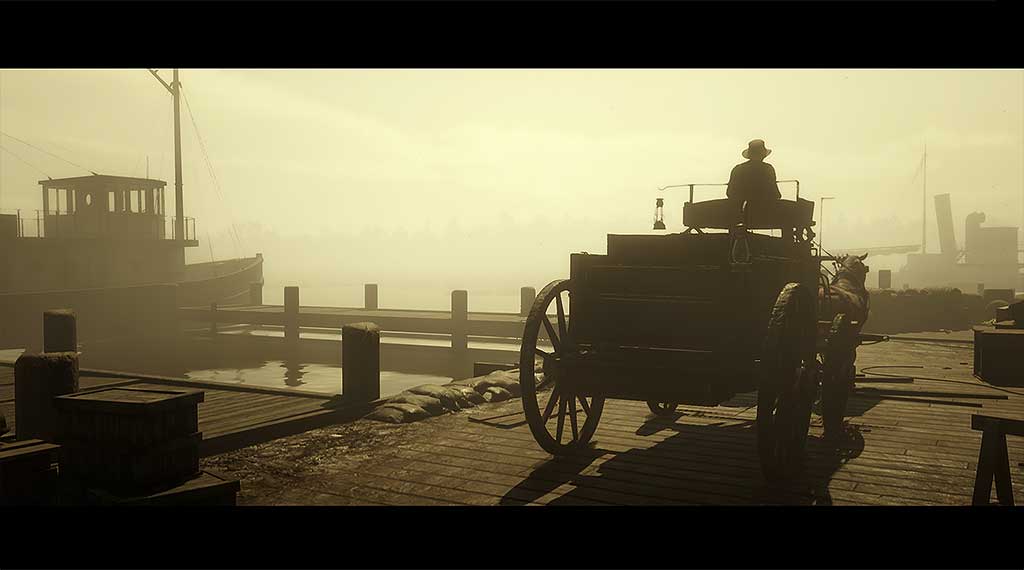
Come Hell, Come High Water
A trip from Annesburg to Van Horn should be easy, right?
In this mission, you are tasked with protecting Lem, during a ship delivery at Van Horn. The mission is rather straightforward – just hop on the boat and shoot at the enemies until Lem manages to reach a safe harbor and deliver his trades.
During this mission you will find enemies on small boats, along the shores and even on a moving train. When facing enemies on the shore, be aware that some carry dynamite to damage Lem’s ship. Make sure to take them out before they reach the ship.
Hixon, the moronic hick
The train is so far away that you need a rolling block rifle to take out those enemies. There are ammo boxes for rifles and shotguns on the top tier of the boat.
A Bitter Means to a Bitter End
In this one, your objective is to ruin a rival’s production by adding a special mixture to the booze. Tainting the vats will earn you a bigger reward. If for some reason you fail to accomplish this, you can always destroy the vats with your weapons.
To make the mixture, you will need fresh ingredients. Maggie points out the location of some of the ingredients. Along the way you will find a bear (watch out) that will supply you with animal fat. Closer to the objective you’ll find a couple of tents with 3 enemies being attacked by a cougar. Try not to be seen by crouching and avoiding them. Grab the Oleander sage past the camp. If they spot you, take the time to loot them and skin the cougar.
We must be vewy vewy quiet… shhhh!!
Move forward to the next camp and go around it until you find Creeping Thyme. You only need one. Try to avoid the guards as there are many of them.
To craft the mixture hold E to rest and then R to craft.
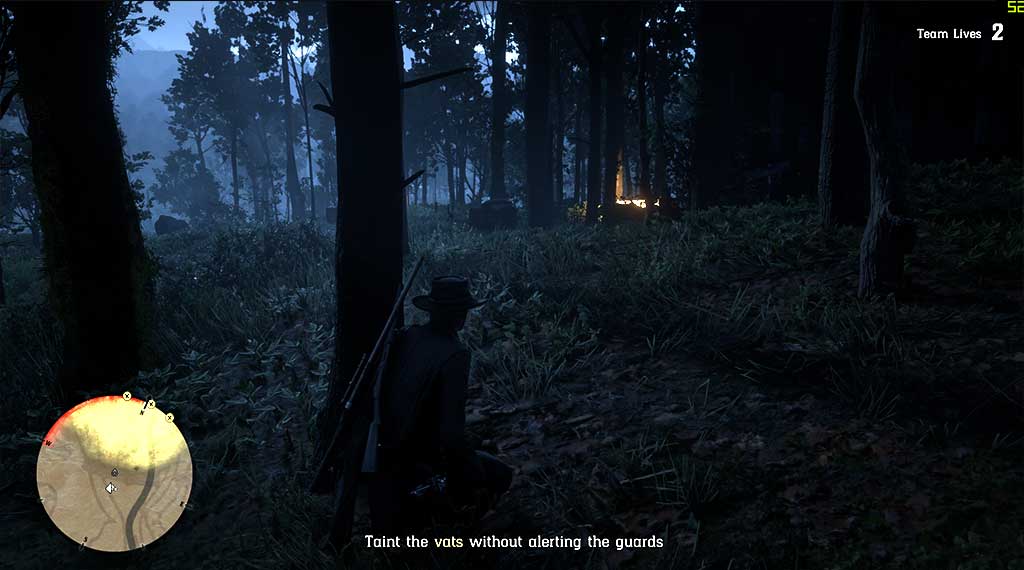
Next up, you will need to taint the vats without alerting the guards by staying undetected. If they are looking at the vats, wait for them to move away, or deal with them silently.
These guys have an army of dirty, sick dogs that will sniff you out and attack you if you’re detected.
To destroy the vats simply shoot them and they will blow up. They will send a couple of horsemen after you – a fight you can easily avoid by running towards the final objective.
The Certainty of Death and Taxes
In this mission, your job is to protect Lem, capture your rival Danny-Lee and get rid of Hixon.
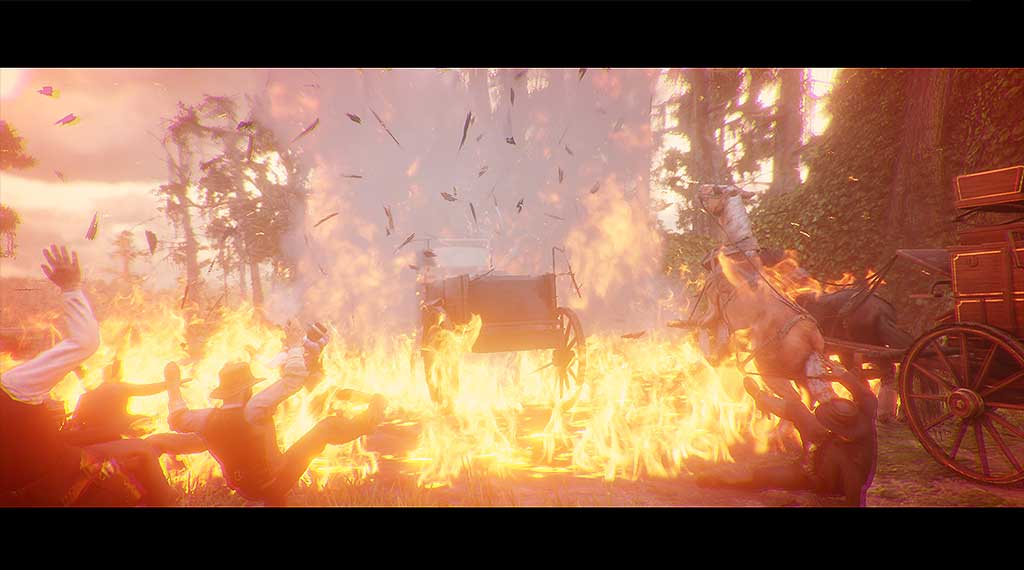
On the first part of the job you will need to prepare an ambush by spilling moonshine around an area. Then you wait.
BA-DA-BOOM!
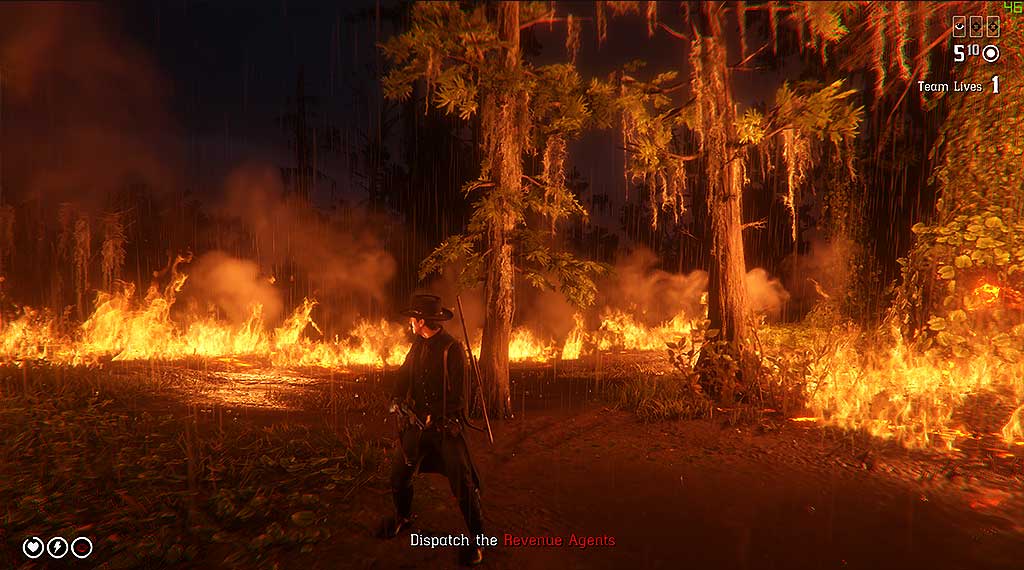
Things don’t really go as planned. Grab a shotgun and run after Hixon. Instead of killing them one by one, simply push your enemies into the fire or fire at them into it.
When you finally exit the fire corridor, you’ll find yourself on a road riddled with enemies. Use the trees for cover. There are some crates along the road so try to avoid it. Move to the left of it. It will be easier for you to spot them on the road, behind cover. There’s also a very good reason to move left of the road. There’s a deadly Maxim machine gun at the end of the road. When you move to the left, the machine gunner will have his view obstructed by a tree and thus unable to hurt you.
Inferno at the swamp
After dealing with Hixon, avoid all enemies by running into the swamp and over the railway. Keep running towards Danny-Lee, hogtie him and deal with the enemies. If you’re unable to call your horse, grab one from the bandits and stow Danny-Lee on it. Then make a run to the final objective.
This was the last storyline mission.
You are now able to repeat these missions at a different difficulty level. Besides any loot and mission rewards, you should earn 50$ through the Benefits menu that shows up when you access the multiplayer main menu (simply press ESC while in free roam).
Bootlegger missions
“Bootlegger” missions are available from Maggie. These represent simpler-than-storyline-missions that also help you lower mash prices.
In one of them, you need to deviantly poison a rival bootlegger’s stock. Alternatively, you’re able to destroy it and then deal with every enemy around it and the ones that spawn later on. Be careful when approaching the distillery as, when punctured, it fires steaming hot vapors that throw you to the ground. Enemies deal a significant amount of damage with their weapons, and time is a concern as things can get tricky if you start respawning too often. In one situation, the initial mission objective was so far away from my shack that the timer wasn’t enough to go there while going in a rather straight line.
In another mission, Maggie asks you to clear roadblocks placed by the Revenue Agents in two locations. Once you reach the first one, a timer starts, so make sure you don’t waste too much time dealing with all the agents. A stealth approach is possible but very difficult as they face both sides of the road. Revenue Agents are trained shooters. Be aware that they are very precise even at longer distances. Shoot the oil lamps to prevent them from taking cover behind the boxes nearby.
The third one was my favorite. I even giggled a little. You have to escort a drunk patron from the nearest saloon. While doing so, you will face a couple of enemies with their fists raised, ready to strike you. The patron is too drunk to go from point A to point B in a straight line, so expect having to follow him into some dark alleys. This mission is rather simple and easy, but fighting with your fists is always tricky in RDR2. Make sure you do it after drinking a few shots of moonshine.
Corpses, corpses everywhere
The substantial number of corpses leftover from these missions means that there’s plenty of stuff to loot. These Revenue Agents also seem to hold special ammo very often. Considering the number of shots required to take them out, it is only wise to loot them all afterward!
This article was made possible by the contributions of several Redditors: Waydownunder91, dbern707, Freejaveliner, (adding more as they come)
As you might remember from my previous post I’ve been playing Red Dead Redemption 2 recently. Unfortunately, sometimes, as with Grand Theft Auto 5 and The Division 2, I would experience CPU and graphics card usage peaks that caused the game to pause for a few seconds or even disconnect from the online game when the peak was too long. Sometimes I would get stuck in a loading screen for ages until finally, the game’s online status timed out.
The game “loses” connection to the server, not because of an Internet connection problem, but instead due to an extended delay in a response to the server. This is caused by the local CPU/GPU.
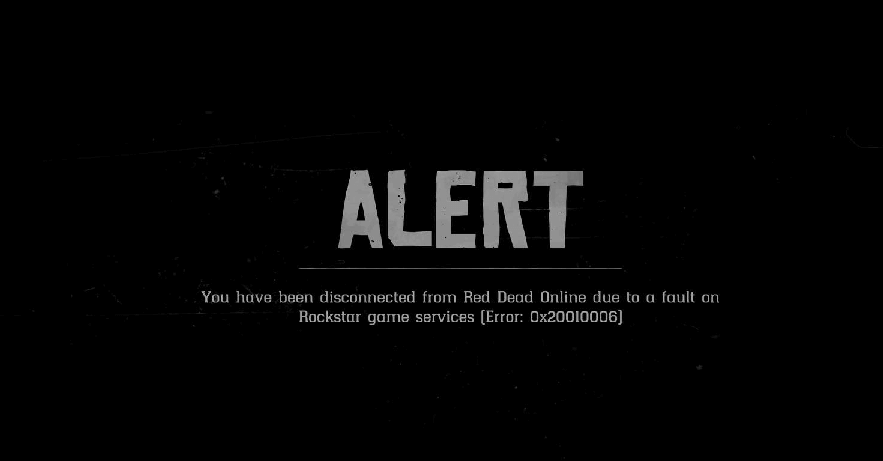
Because of this issue, many players get this message when playing Red Dead Redemption 2 online:
ALERT: You have been disconnected from Red Dead Online due to a fault on Rockstar game services (Error: 0x20010006)
This is the error many players are getting because of poor CPU/GPU performance
This was particularly common when Red Dead Redemption 2got released, but I thought I had fixed it until yesterday (14th November 2019) when the new patch was delivered. Apparently, this affects some CPUs and NVidia graphics cards.
I’ll go over the official and the non-official fixes. I’m currently using both.
How to fix stuttering, disconnects, and performance with Launch Arguments
Before following through this post for more in-depth fixes, check out a tool I developed to help you set up Red Dead Redemption 2 launch arguments. One of the sections on that tool is specific to performance. It also helps with graphics, bugs, stuttering, etc.
Before changing anything, make sure you update your graphics card drivers! I’m pretty sure this is a CPU+graphics card issue and it definitely might help to make sure you’ve got the latest graphics driver – especially for NVidia graphics cards.
The Official Patch
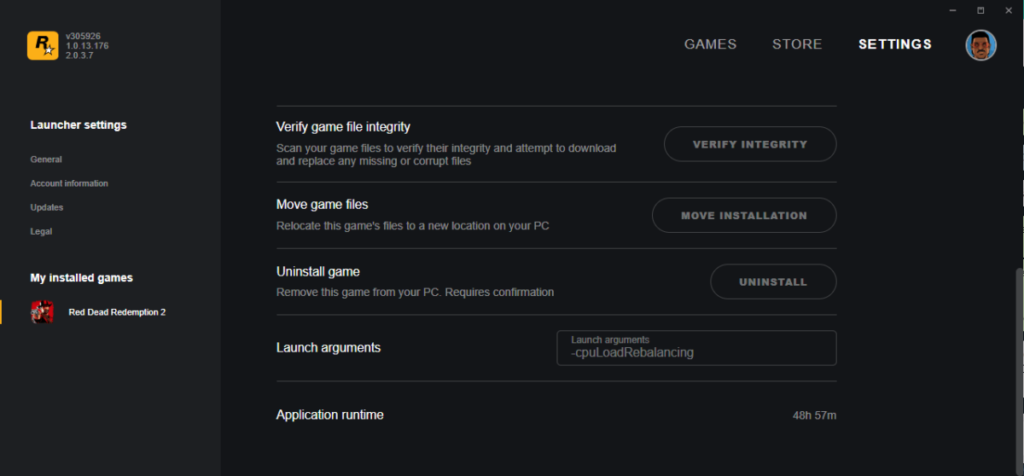
This new official patch actually introduces a CPU load balancing feature – but it has to be enabled manually in the Rockstar Games Launcher. To do this, you should go to your Rockstar Games Launcher and click Settings on the top right corner. Then at the lower-left corner select Red Dead Redemption 2, which will display your options for the game. Scrolling down to the bottom you’ll find a Launch Arguments section, where you should input the newly added argument (on the 14th November 2019 patch):
-cpuLoadRebalancing
Don’t forget the “-“!
Another Official Update – 14 Nov 2019
On the same day, Rockstar dropped an article on how to fix an issue related to certain NVidia graphics cards. Check it out:
Players with NVIDIA graphics cards and 4-core or 6-core CPUs should install the GeForce Hotfix Driver Version 441.34 from NVIDIA and remove any launch arguments to resolve this issue. – ROCKSTAR
This alternative hotfix is available right here by installing the latest GeForce Hotfix Driver Version 441.34. Apparently, if CPU isn’t your problem, then the graphics card might be the culprit! Let me know if this solution fixes it for you!
The non-official way to improve system stability
Let’s start by reducing your current CPU load.
By doing so, we’ll be giving more room for the game to function properly without resorting to RAM buildup or disk caching which both may cause bottlenecks and thus stutters, disconnects, and crashes.
CPU, RAM, DISK, how does that even work… and why is that a problem?!
As you know, a processor makes mathematical calculations, but it takes some time to deliver them. Let’s say you arethe CPU and I’m giving you a paper which says 3+5=?. Easy. Right?
Now I’m giving you a sheet of fifty pieces of paper, each one with a different calculation to perform. Aaaand now I’m giving you one hundred more calculations.
You can’t really hold them all in your hands and you need more time to deliver those results before I give you more calculations to perform!
…This sounds a lot like my old boss.
So you put those sheets of paper on your desk while you make your calculations. That’s yourRAM. Once your desk is filled up and there’s nowhere else to put more paper on it you start using your desk’s drawers, which takes a bit longer because now you need to open them up before placing the paper in there. That’s yourDISK.
Slowing down to a halt
Okay, so my CPU isn’t the best. I’ve been using it for a few years now and it is starting to feel the weight of age with heavier processes and games. GTA V was also very CPU intensive. I also love flight simulators which also consume a TON of CPU capacity. I’m really looking forward to the new Microsoft Flight Simulator 2020. You have got to check it out. It is absgorgeously beautiful.
This has led me to try and find ways to circumvent this issue and get the best performance out of my rig. So let’s get right to it.
Steps to reduce CPU usage
Let’s start by freeing up your CPU from unnecessary calculations and clearing up your RAM usage by turning off stuff that isn’t required to run the game.
Start by closing EVERY browser window, WhatsApp, Spotify, opened Windows folders, etc. also check your tray icons next to your system clock for useless software that might be running in the background. Disable any on-going anti-virus full system scans (no need to turn real-time protection off).
Google Chrome is a heavy CPU load hog – make sure you save this page to your bookmarks and close it now! I mean, later, when you’ve read through this post!
Check your system load by pressing CTRL+SHIFT+ESC to bring up your Windows Task Manager and click on the CPU tab to check which processes are consuming the most out of your processor and make try to turn them off if you can.
The tabs are in Portuguese, but notice how RDR2 chews up so much CPU! I’ve opened up a folder on Windows Explorer and it consumes 7% CPU just for laying there!
Note: to the right you’ll also see a tab for GPU usage. If you notice that your GPU usage is above 70% then you definitely should consider upgrading your graphics card. Check your graphics card at GPUCheck and see how it performs compared to more recent card models. If instead you wish to see how your CPU compares, check out PassMark.
An alternative to improve CPU usage and reduce stalling
It helps to maintain system stability by adjusting CPU process priorities. This means that it will do its best to make sure that your system keeps running smoothly by prioritizing processes that are critical to System stability. RDR2 likes to peak CPU usage from time to time – to a point where it will make the whole system unresponsive, which leads to a crash to desktop or a BSOD (it did happen to me before using Process Lasso!).
You may also use it to safely free up RAM automagically.
I have to say that I noticed a significant improvement in system stability since I started using Process Lasso.
They have very nice documentation that explains how to use it in detail. Make sure to check them out beforehand!
In conclusion…
Sure, maybe your old machine needs an upgrade – but the truth is that even with new PC builds, you’re prone to encounter issues like these again, as the CPU usage spikes are abnormal and caused by bad programming and rushed software development.
I just recently decided to hop into Westworld… I mean, Red Dead Redemption 2 on PC knowing that this would be a game I would enjoy. I’m currently writing a review for it (If only I could stop playing it to write my review…).
Unfortunately, just like its older brother, Grand Theft Auto 5, it doesn’t natively support my NVidia Surround ultra-wide screen resolution for my triple-screen setup.
Click for a higher resolution.
This fix may not be required for everyone, but for some reason, the resolution simply didn’t show up on the game’s graphical settings. It only went up to 1920×1080.
Just to be clear, I’ve got 3 monitors and I’m also a streamer on Twitch with a streaming computer that uses one of my screens when I stream, which automatically changes my screen resolution to 3840×1080 – I’m using DisplayFusion to achieve this behavior. Plus HDMI routers, DVI adapters, screen recorders… Not even my computer understands what’s going on with my screen resolutions.
In this post, I’ll be going over several ways to fixing your screen resolution. Please consider this a repository of suggestions. I can’t promise that they’ll all currently fix the issue, but they have worked in the past. Give it a try and let us know which one worked for you!
How to fix ultra-wide surround screen resolutions the easy way with Launch Arguments
Before following through this post for more in-depth fixes, check out a tool I developed to help you set up Red Dead Redemption 2 launch arguments. One of the sections on that tool is specific to screen resolutions. It also helps with performance, bugs, stuttering, etc.
This fix should make the game run in any screen resolution.
UPDATE: As of the last patch, it seems like some of these tricks aren’t working for some users. Check the bottom of this post for alternative ways to make it work! Leave me a comment if it does!
Apparently, the game engine has progressed quite significantly since GTA V. Back then, I managed to find a work-around for GTA V, but RDR2 seems to accept 5760×1080, much more easily.
To make 5760×1080 work, I had to go through My Documents folder and find the Rockstar Games folder. Within it, the Red Dead Redemption Folder and then the Settings folder. In it, you should find a file called system.xml
In my computer this is located at: C:/Users/[windows username]/Rockstar Games/Red Dead Redemption 2/Settings/system.xml
Here, you should set the screenWidth and screenHeight to your desired screen resolution. After this step, you should save and close the file and then right-click on it and go to File Properties and set it to Read-Only. This prevents the game from making any changes to it. Keep in mind that setting this to Read-Only will keep you from saving adjusted game settings from within the game. This means that if you make any changes in-game, the settings will be reset every time you launch the game.
Also note that, for even more exotic users, if you’re using several screens but only wish to use one set of them, then you should change the outputIndex and/or the adapterIndex value. This may only be required if you’re using more than 3 screens, or when you’re having trouble with stretching or positioning on 2 screens.
The cowboy rests.
Alternatively, if this change fails to set your resolution correctly, try following my GTA V video which uses windowed mode and a piece of software called ResizeEnable.
An updated method to get 5760×1080 in RDR2!
As of the last update, it seems like some of these tricks aren’t working for some users. Instead, try using the command line.
Go to your Rockstar Games Launcher -> Settings -> Red Dead Redemption 2 (on the left sidebar) -> search for the launch arguments text field Then type the following:
-width 5760 -height 1080 -borderless
You may also replace borderless with “-windowed“. Alternatively, try using
-allowResizeWindow
…and then try to stretch the frame of the window to your screen resolution (can’t do this in borderless mode)
The reason why you’re not usually able to go full resolution is that when not in surround mode, the game knows you have 3 screens but thinks that you only play in one of them so it sets itself to 1920×1080.
How to fix the UI being displaced or stretched
Some players might be able to set their screen resolution correctly, but the UI elements (the map, the menus) might show off-center, displaced or distorted. To fix this, you may want to try using -noDPIAdjustin your command line arguments list. A special thank you to one of our users, Jon, who shared this solution by another player who helped him, NorbzFR.
You’re done!
Now bask in the glorious landscapes that this game has to offer. They look absurdly beautiful at a 3840×1080 or even 5760×1080 resolution.
Next step: VR.
If this guide helped you, send me your best Ultra Wide Wide West Screen Shots! Too many puns. Bang!